Get Started with Datacenter Proxies
Learn how to configure datacenter proxies with our quick start guide and collect web data without facing CAPTCHAs or IP bans.
14-day money-back option

<0.3s average speed

99.99% uptime

500K+ IPs

2K subnets

24/7 tech support

Dedicated, rotating & static IPs

What is a datacenter proxy?
A datacenter proxy is an intermediary between a user's device and the target. These proxies originate from database servers and are perfect for users prioritizing speed and stability. Proxies mask the user’s original IP address and allow them to browse the net incognito.
Most popular datacenter proxies use cases
Enjoy unmatched stability and complete your tasks with ease.

AdTech
Maximize your ad performance, make sure your campaigns are displayed correctly, monitor competitors, and prevent fraud from a range of global locations.

Web scraping
Power up your business with valuable web data extracted from relevant targets. Stay updated, base your decisions on data, and put yourself above the competition.

Multi-accounting
Juggle between different profiles without facing CAPTCHAs or IP blocks. Pair proxies with free X Browser to get unique fingerprints for every session.

eCommerce management
Track your rivals’ development, analyze price fluctuations, and put your eCommerce business in front of your target audience.
Learn how to set up Smartproxy datacenter proxies
Start your proxying journey faster with our step-by-step video guide.
How to set up datacenter proxies
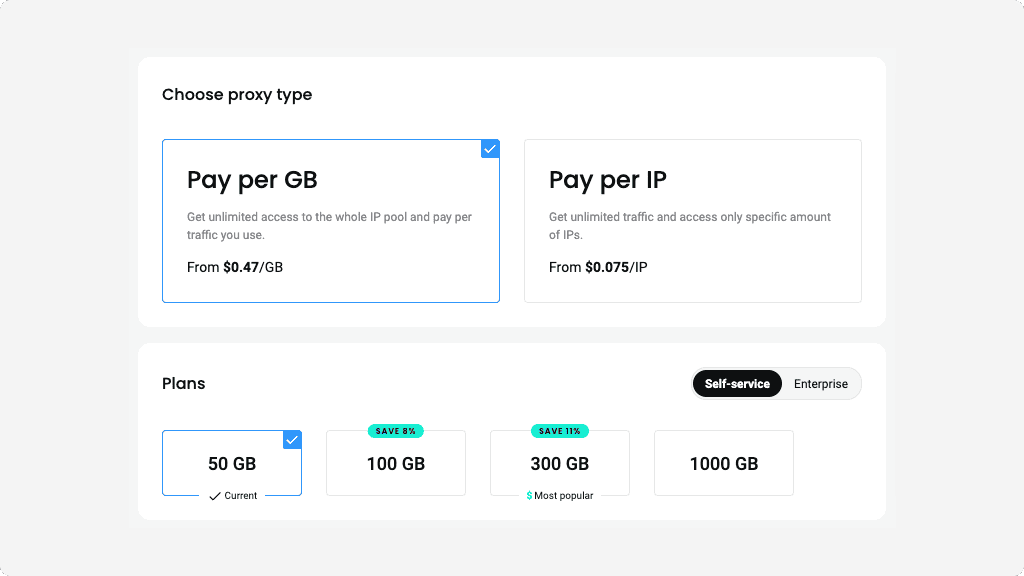
Choose a subscription
After creating your account, choose the subscription option that suits your needs. We offer a range of plans and the ability to upgrade as you go throughout your proxying journey.
Select Pay per GB proxy type to get unlimited access to the whole IP pool and pay for the traffic you use or Pay per IP proxy type to get unlimited traffic and access to a specific number of IPs.
With Pay per IP, you can choose between using a shared pool of IPs or dedicated IPs that will belong only to you.
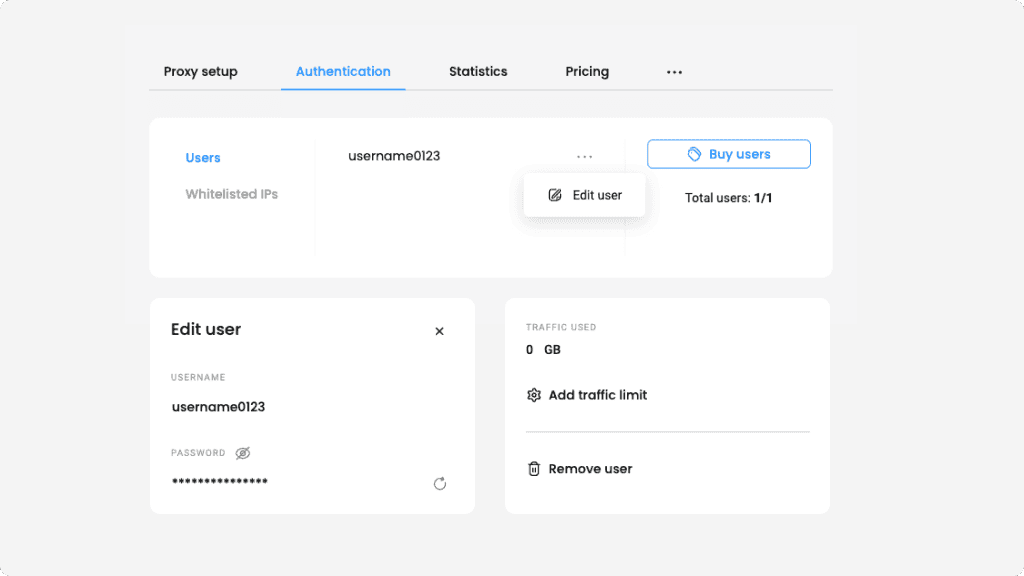
Authenticate with username:password
With Pay per GB plans, you’ll find the authentication settings in the Proxy setup tab. Meanwhile, if you bought a Pay per IP plan, go to the Authentication tab.
You’ll see that your first proxy user is created automatically. To delete it, click the three dots next to your username, select Edit user, Remove user, and Confirm.
To create a new user, click Create user. You can enter a custom username, while the password will be generated automatically.
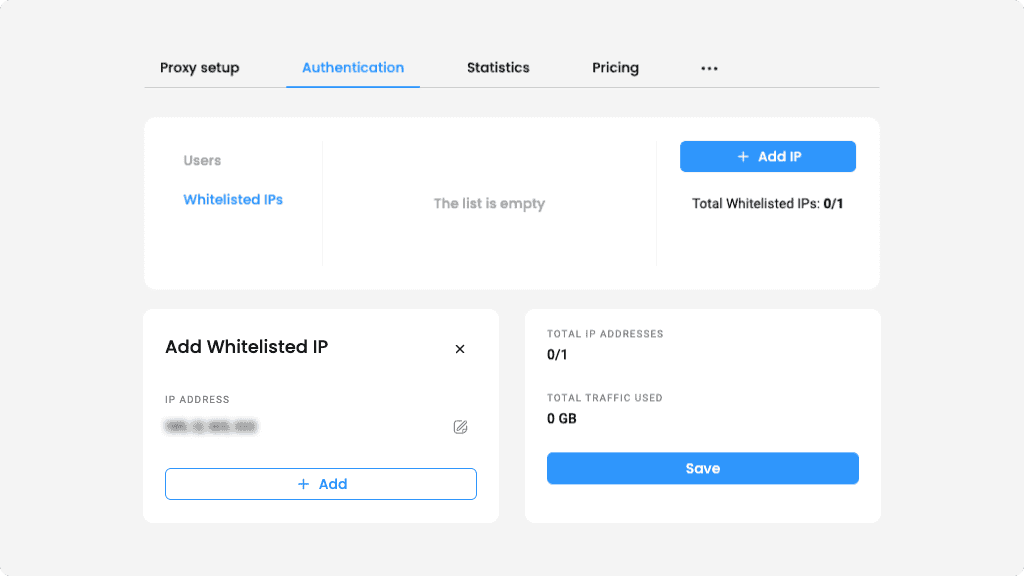
Authenticate by whitelisting IPs
If you bought a plan with Pay per IP, you can use whitelisted IP authentication. In the Authentication tab, click on Whitelisted IPs. Then, select Add IP, enter an IP manually, and click Save. Alternatively, you can add your current IP by simply pressing + Add.
Please note that we only support IPv4 format IPs. Ensure the IP you're adding is yours, and you’re not using a proxy or VPN service.
To name your whitelisted IP, click on the three dots and Edit IP. Select the edit icon next to Name, type in any name, and save it. To remove an IP, click the trash bin icon and Confirm.
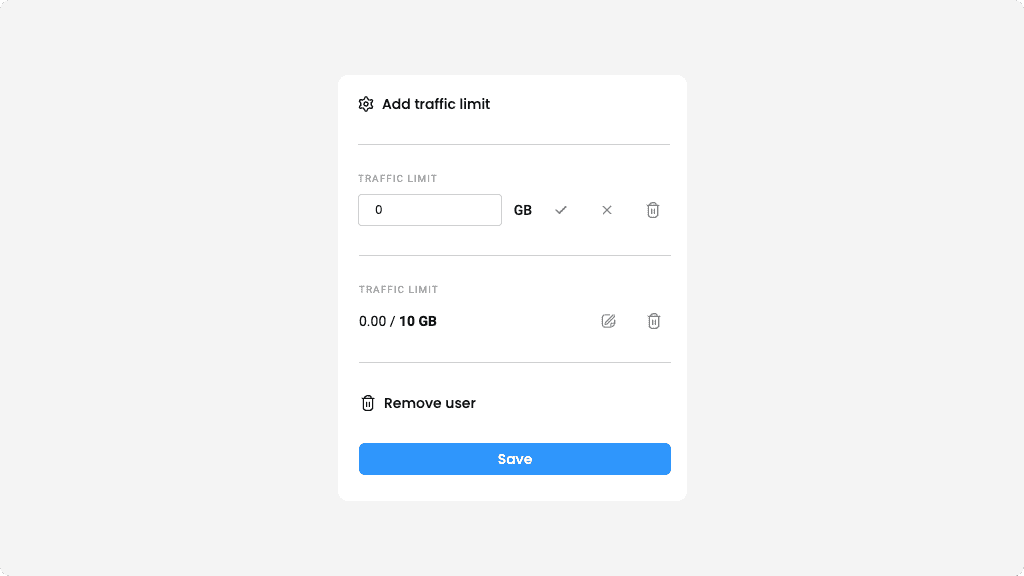
Add a traffic limit
To set a traffic limit for a user, click on the three dots, Edit user, and Add traffic limit. Input an amount of GBs the user won’t be able to exceed, and click Save.
Select parameters
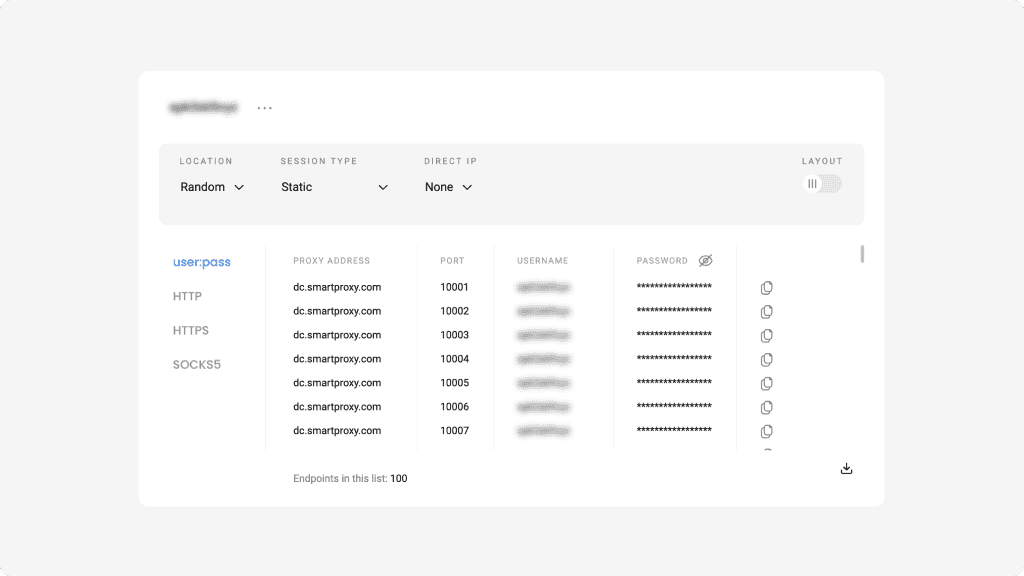
Navigate to the Proxy setup tab. Select a user (if you have more than one), and then you’ll be able to customize your proxy parameters.
Under the location menu, opt for "Random," to select IPs from our pools randomly, or choose a specific country.
Under the session type menu, choose static sessions and keep the same IP or rotating sessions to change IP with each new request.
You have an option to select one or multiple specific IPs to use under the Direct IP menu.
Next, choose your preferred protocol. Our datacenter proxies support connections using HTTP, HTTPS, and endpoint:port configuration.
You can enter a number of endpoints you’d like to be generated. The default value is set to 10. Copy a specific part or one entire endpoint to your clipboard, or download the list in CSV or TXT format.
Keep track of your statistics
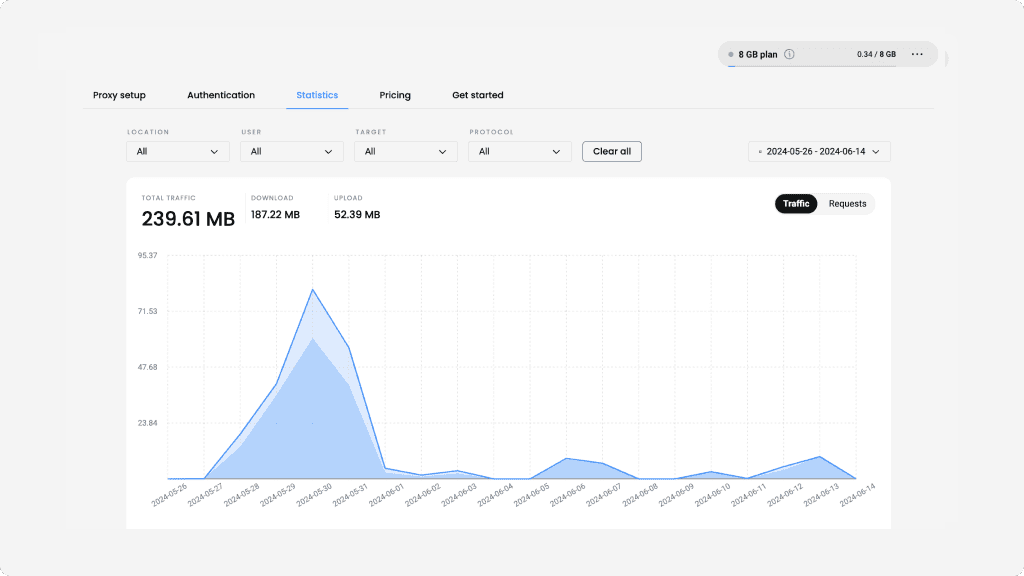
To monitor your proxy usage, navigate to the Statistics tab. Here, you’ll see the traffic usage for each user over a week, month, or a custom period. You can also view the amount of cumulative uploads, downloads, and requests.
Use datacenter proxies
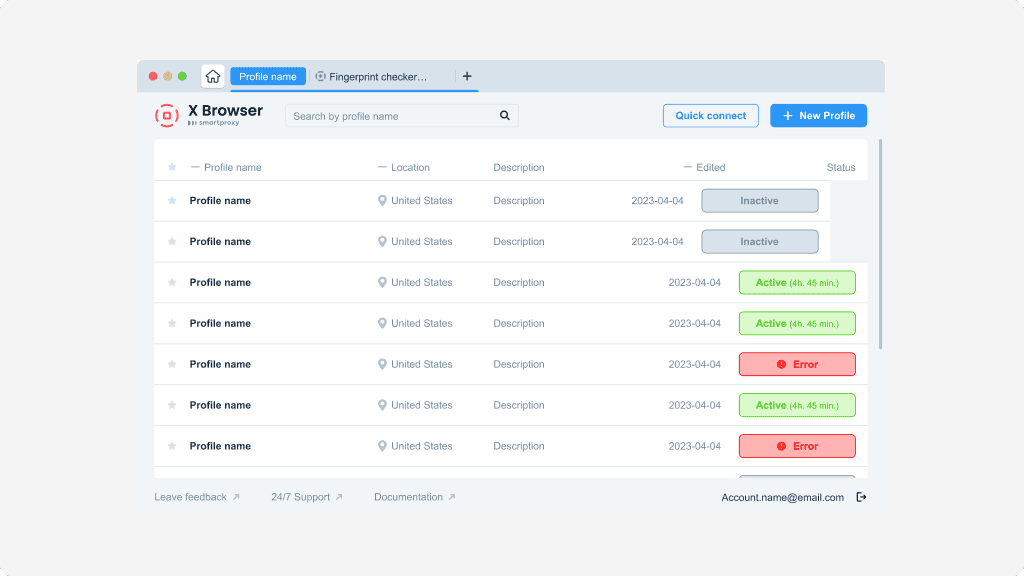
Apply the proxy endpoint information and, if required, credentials to any application or tool. You can integrate our datacenter proxies with a range of third-party tools or our free X Browser to complete your tasks with ease.
Free tools, same great user-friendliness

X Browser
Juggling multiple profiles has never been easier. Get unique fingerprints and use as many browsers as you need, risk-free!

Chrome Browser Extension
Easy-to-use, damn powerful. A proxy wonderland in your browser, accessible in 2 clicks. Free of charge.

Firefox Browser Add-on
Easy to set up, even easier to use. The virtual world at your fingertips in 2 clicks. Free of charge.

Proxy Checker
Verify your IPs with free Proxy Checker. Quickly & efficiently check your IPs to avoid potential errors.
Smartproxy blog
Most recent

How to Scrape Amazon Prices Using Excel
If you’re here, you already know Amazon constantly tweaks product prices. The eCommerce giant makes around 2.5 million price changes daily, resulting in the average item seeing new pricing roughly every ten minutes. For sellers, marketers, and savvy shoppers, that creates both a challenge and an opportunity.
This comprehensive guide walks you through proven methods – from Excel's built-in tools to powerful scraping APIs that can simplify your Amazon price monitoring workflow.

Zilvinas Tamulis
Mar 31, 2025
8 min read
14-day money-back option


