A Comprehensive Guide on Using Proxy with cURL in 2025
Whether you're a developer or an IT professional, data is an essential element of your everyday tasks. One of the most popular tools for data transfer is cURL (client for URL), which is embedded in almost every device that transfers data over different internet protocols.
However, when it comes to transferring data through a proxy, using cURL becomes even more critical. So, let's delve into the basics of cURL and proxies, discuss how it works, and get valuable tips on how to use cURL with proxy settings.
So, buckle up, pal, and get ready to learn how to use cURL with proxy and why it is essential in data transfer.
What is cURL?
cURL is a command-line tool that lets you transfer data from or to servers with URL syntax commands. It's embedded in almost every device that transfers data over different internet protocols.
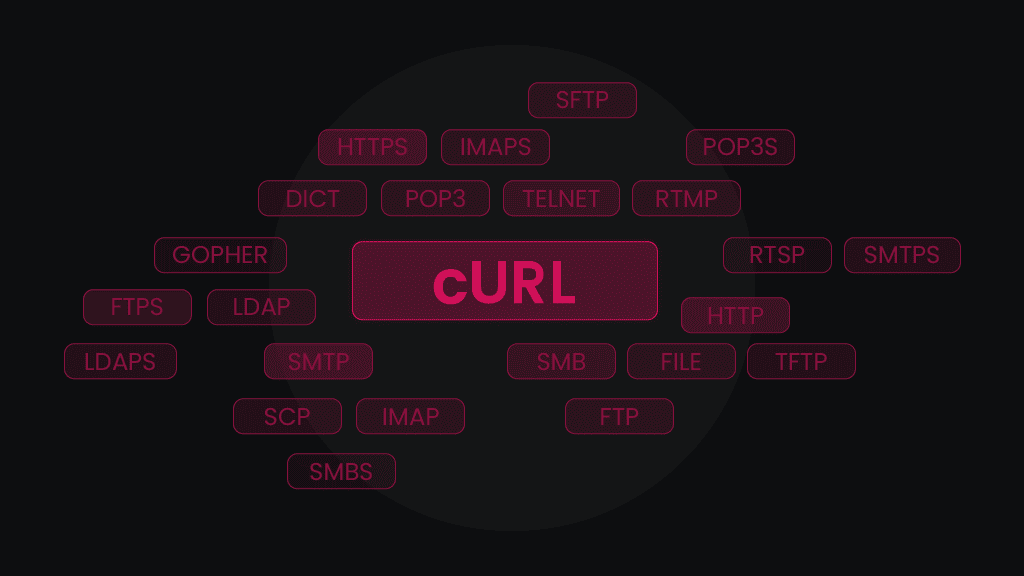
With cURL, you can use over 20 protocols, including HTTP(S), FTP(S), POP3(S), and SMTP(S). It supports proxies, FTP uploads, SSL connections, and cookies, making it a reliable and flexible tool for data transfer.
What can cURL do?
There's a lot that cURL can do! Here're the most popular use cases where you can equip cURL:
- Downloading files from the internet. Download files from websites and servers easily, without the need for a web browser.
- Uploading files to a server. Upload files to servers, making it a popular choice for developers and system administrators.
- Testing RESTful APIs. Test RESTful APIs and web services, as it supports a wide range of HTTP methods and custom headers.
- Debugging network issues. As a command-line tool, cURL can be used to diagnose network connectivity issues and help troubleshoot problems.
- Checking the status of web servers. Check the status of web servers and monitor their response times.
- Automating repetitive tasks. Automate repetitive tasks such as data transfers, backups, and monitoring.
- Scraping web pages. Scrape web pages and extract data from them, making it a popular choice for data analysts and researchers. But don't forget to equip proxies to get the ultimate scraping combo.
Getting multiple URLs with cURL
cURL lets you get alphanumeric sequences by using brackets. Here's an example:
http://www.website.example/photo[1-11].jpeghttp://www.website.example/photo[a-z].jpeg
{} brackets let you set multiple URLs, for example:
http://website.com/{home,about,contacts}
Pro tip: if you're using cURL from a command-line prompt, it's best to put the full URL into double quotes. Otherwise, the shell might interfere with the syntax, especially if you use special symbols (e.g. ‘&' or ‘?') in the URL.
If you don't specify a protocol at the start of a syntax, cURL will use HTTP by default. Otherwise, it will use other protocols based on the prefix.
cURL works with multiple programming languages, so developers use it to create various apps. But your average Joe probably knows this command-line tool for calling APIs.
As for proxies, using the cURL command is a great way to check whether a proxy connection is set up correctly.
cURL installation
It's not as hard as you might think! All new macOS and Linux distributions come with cURL already installed, so you don't need to put any additional effort to start using cURL. All gadgets with Windows 10 have cURL installed too.
If cURL isn’t provided, you can install it by running the install command on your Linux distributions. You just need to open Terminal on Ubuntu and run this command:
sudo apt install curl
If you're running one of the older versions of Windows, download cURL from the official download page. You're welcome!
What will you need to start using proxies?
Once you've got the cURL setup sorted out, you need to know what you’ll need to start using cURL with proxies. So, here's the list:
- Choose a proxy provider that fits your use case and sign up for their services. Just a little bias moment – our residential proxies are lightning-fast and have an exceptional 99.99% uptime.
- Get the proxy server address, port, protocol, username, and password if authentication is required.
- Configure cURL to use the proxy when you run the command.
For example, you can use a cURL command to show the output of a URL with:
curl -v http://website.io
cURL can also use a proxy:
curl -x nl.smartproxy.com:10000 http://example.com
If you want to dig deeper, we recommend checking out the documentation on the cURL website.

Using cURL with HTTP/HTTPS proxy
As we've mentioned, most Windows and macOS devices come with pre-installed cURL libraries (libcurl). The unfortunate part is that many users are unaware of how to use these libraries properly and cURL with HTTP(S) proxy.
In reality, curling with a proxy is very simple. You simply need to add a variable in the cURL syntax so that your command line would include the -x or --proxy (both mean the same thing and can be used interchangeably). Just note that the command lines are case-sensitive!
For instance, this command will use the cURL with the HTTP proxy protocol.
http_proxy [protocol://][:host][:port]
While this sets cURL with HTTPS proxy protocol:
HTTPS_PROXY [protocol://][:host][:port]
You can set proxy protocols through the prefix by using any of the following prefixes:
http://https://socks4://socks5://socks4a://socks5h://
This syntax sets the proxy protocol to the one you specify for the URL:
[url-protocol]_PROXY [protocol://][:host][:port]
Since cURL is syntax-dependent, it offers no user interaction. That means you have to define a proxy in the cURL syntax. To do this, use the command below and enter proxy information, for example:
curl -x gate.smartproxy:10000 https://ipinfo.io
We use ipinfo.io in this example because it returns the proxy information and is very helpful when you want to be sure that you’re using a proxy correctly.
Remember, you can also use the --proxy command instead of -x.
To check a random rotating proxy on https://ipinfo.io with cURL, use the following syntax:
curl -x gate.smartproxy.com:7000 https://ipinfo.io
This syntax will send a request to ipinfo.io with the HTTPS protocol and the gate.smartproxy.com:7000 endpoint (gate). This will work only if you have whitelisted your IP address in the dashboard.
To check the same proxy with proxy user credentials (login:pass), you must use the -U parameter. Note that the parameter uses the capital U:
curl -U username:password -x gate.smartproxy.com:7000 https://ipinfo.io

Command line argument to set proxy in cURL
Another thing you need to know is how to set the proxy server using command line arguments. To use cURL with proxies through command line argument, you can take this basic format line:
curl --proxy <PROTOCOL>://<PROXY_IP_ADDRESS>:<PROXY_PORT> <URL>
Replace <PROTOCOL>, <PROXY_IP_ADDRESS>, <PROXY_PORT>, and <URL> with the appropriate values for your proxy.
- <PROTOCOL> is either "http" or "https", depending on the type of proxy you're using.
- <PROXY_IP_ADDRESS> is the IP address of the proxy server you're using.
- <PROXY_PORT> is the port number the proxy server is listening on.
- <URL> is the URL of the website or service you want to access.
For example, if your proxy IP address is "192.168.1.100" and your proxy port is "8080", and you want to access the website "https://example.com", you should run:
curl --proxy http://192.168.1.100:8080 https://example.com
With this command, cURL will route all requests through a proxy server, allowing you to access geo-restricted content and websites.
Using environment variables
You can also use cURL with proxies by setting environment variables. This can be handy if you wanna use the same proxy server for multiple commands or apps.
First, you'll need to set the following environment variables:
- http_proxy for HTTP traffic;
- https_proxy for HTTPS traffic;
- all_proxy for all traffic.
Set the value of each environment variable to the URL of your proxy server, including the protocol, IP address, and port number.
For example, if your proxy server is located at "http://192.168.1.100:8080", you would set the http_proxy and https_proxy environment variables like this:
export http_proxy=http://192.168.1.100:8080 export https_proxy=http://192.168.1.100:8080
If you wanna set the all_proxy variable instead, you would use the following command:
export all_proxy=http://192.168.1.100:8080
Once you've set these environment variables, cURL and all other apps that support these variables will automatically use the specified proxy server for all yo' requests.
An environment variable is a dynamic-named value that can influence the behavior of the running processes on a computer. They’re a part of the particular environment in which the process runs and can be used in two different ways:
Store information about your system
You can use environment variables to look up your username on CMD:
echo %USERNAME%
In addition, you can access hidden AppData folder with a command:
echo %APPDATA%
It'll show you in which system AppData is stored in your computer.
Path tracking
PATH is one of the main environment variables that locates all operating systems' executable programs. Find each executing process or user session with this command:
echo %PATH%
If you want to use cURL or Python, you need to run them through command line that looks similar to this:
C:/Windows/System32/curl.exe ip.smartproxy.com
The best part is that if you use this environment variable in the cURL command, Windows will always recognize it and will run:
C:/Windows/System32/curl.exe
Why check proxies with cURL?
We use cURL because it’s the easiest way to check your proxy endpoint setup before starting to scrape data.
Smartproxy allows you to send unlimited concurrent requests from different IP addresses (including sticky IP sessions). This lets you scrape the web quicker and pulls a lot more data from public APIs.
Read more about proxy settings in our help documents.
Using domain:port format in cURL
Here’re some helpful tips on how to use cURL with proxies.
Example for a rotating session, random location option
The gate.smartproxy.com:7000 will rotate your IP to an IP address from a random location with every new request.
cURL (with user:pass authorization) will look like:
curl -x http://username:password@gate.smartproxy.com:7000 http://ip.smartproxy.com/json
cURL (with whitelist authorization) will look like:
curl -x gate.smartproxy.io:7000 http://ip.smartproxy.com/json
Example for a rotating session, specific location option
You can use a single city/country specific proxy address (endpoint) to get a random proxy in that city/country with every query. For example, use us.smartproxy.com:10000 for IP addresses in the US.
cURL (with user:pass authorization) will look like:
curl -x http://username:password@us.smartproxy.com:10000 http://ip.smartproxy.com/json
cURL (with whitelist authorization) will look like:
curl -x us.smartproxy.io:10000 http://ip.smartproxy.com/json
Example for a sticky session, random location option
Your new IP address will not change with each new request but will stay the same for a longer period (from 1min up to 24hrs). When you need to establish sticky sessions with IP addresses from random locations, use a single backconnect entry node with the sticky session parameter.
cURL (with user:pass authorization) will look like:
curl -x http://username:password@gate.smartproxy.com:10000 http://ip.smartproxy.com/jsoncurl -x http://username:password@gate.smartproxy.com:10001 http://ip.smartproxy.com/jsoncurl -x http://username:password@gate.smartproxy.com:10002 http://ip.smartproxy.com/json....curl -x http://username:password@gate.smartproxy.com:49999 http://ip.smartproxy.com/json
cURL (with whitelist authorization) will look like:
curl -x gate.smartproxy.com:20001 http://ip.smartproxy.com/json...
Example for a sticky session, specific location option
You need to choose sticky ports to keep an IP from a specific location for a longer period. The most popular countries have up to 10,000 ports for sticky IPs. For example, it.smartproxy.com: 25762 will give the same Italian IP address for up to 10 minutes. Please note that this endpoint (it.smartproxy.com) has 10,000 sticky ports, from 20001 to 29999. If you need, you can download them all by clicking ‘Download this list'.
Also, if you need longer session time (for up to 30 min.), write the command as follows:
-U user-username-sessionduration-30 -x it.smartproxy.com:25762
cURL (with user:pass authorization) will look like:
curl -x http://username:password@gate.smartproxy.com:20000 http://ip.smartproxy.com/jsoncurl -x http://username:password@gate.smartproxy.com:20001 http://ip.smartproxy.com/jsoncurl -x http://username:password@gate.smartproxy.com:20002 http://ip.smartproxy.com/json...curl -x http://username:password@gate.smartproxy.com:29999 http://ip.smartproxy.com/json
cURL (with whitelist authorization) will look like:
curl -x it.smartproxy.io:21639 http://ip.smartproxy.com/json
Note that with whitelisted IPs, sessions will always last for up to 10 minutes.

Important tricks and tips
How to always use proxies for cURL
When it comes to utilizing proxies with cURL, it's essential to ensure a seamless experience, and we’re here to guide you through it. To make sure you always use cURL with proxies, simply include the proxy settings in your command.
By using the -x or --proxy flag followed by the proxy URL, you can effortlessly direct your requests through the proxies of your choice. This way, you can enhance your online privacy and access geo-restricted content.
Turning proxies on and off
Flexibility is key, and with cURL, you have the freedom to toggle proxies on and off as needed. To temporarily disable the proxy for a specific curl command, all you need to do is add the -x "" flag or remove the proxy URL from your command.
Bypass SSL certificate errors
Encountering SSL certificate errors can sometimes hinder your browsing experience, but fear not! By including the -k or --insecure flag in your command, you're essentially telling cURL to ignore SSL certificate validation.
This enables you to connect to servers with invalid or self-signed certificates without any obstacles. However, it's important to exercise caution when using this option, as it may compromise the security of your connection. Always ensure you're connecting to trusted sources to minimize any potential risks.
Getting more information about the request
Sometimes you need more information to understand the details of your cURL request. Luckily, there’s a handy solution to satisfy yo’ curiosity. Adding the -v or --verbose flag to your command will give you a wealth of additional information. Detailed output like as headers, status codes, and other relevant data right at your fingertips. Convenient, right?
cURL SOCKS proxy
If you're using a proxy server that operates on the SOCKS protocol, you can continue to use the same syntax with cURL:
curl -x "socks5://user:pwd@127.0.0.1:1234" "http://httpbin.org/ip"
You can also use variations such as socks4://, socks4a://, socks5://, or socks5h:// depending on the specific SOCKS version.
Alternatively, you have another option to set the curl socks proxy by using the --socks5 switch instead of -x. The command structure remains similar, but with a different switch. To include the username and password, you can utilize the --proxy-user switch:
curl --socks5 "127.0.0.1:1234" "http://httpbin.org/ip" --proxy-user user:pwd
Again, you have the flexibility to choose between --socks4, --socks4a, or --socks5 depending on the SOCKS version you require.
Bottom line
cURL with proxies might seem like rocket science at first, but once you get into practice, the more requests you send, the easier it gets. Trust us, we’ve started from nothing, and just look at us talkin’ all programming and stuff!
The main lesson here is to use trusted proxies to help you jump between different locations, avoid restrictions, and enjoy speed ‘n’ stability. Like the ones we’re offering – grab residential proxies, mobile proxies, or datacenter proxies for a bargain with a 14-day money-back option (terms apply).
About the author

James Keenan
Senior content writer
The automation and anonymity evangelist at Smartproxy. He believes in data freedom and everyone’s right to become a self-starter. James is here to share knowledge and help you succeed with residential proxies.
All information on Smartproxy Blog is provided on an as is basis and for informational purposes only. We make no representation and disclaim all liability with respect to your use of any information contained on Smartproxy Blog or any third-party websites that may belinked therein.


