How to Scrape GitHub: A Practical Tutorial 2025
GitHub is one of the most significant sources of technical knowledge on the internet, especially for developers building intricate applications. Follow this guide to learn how to extract this valuable data and effortlessly follow the latest tech trends.

Understanding GitHub data
The culture of open-source projects has given many opportunities for developers to share, contribute, and work together on projects that shape the future of technology. One such hub of knowledge sharing is GitHub.
The idea is based on the Git system, which provides an easy way to maintain and version control your code and collaborate with other developers on shared projects. On a bigger scale, this allows almost anyone to contribute to big projects, raise issues, or reuse the code as a starting point for their ideas (also known as forking).
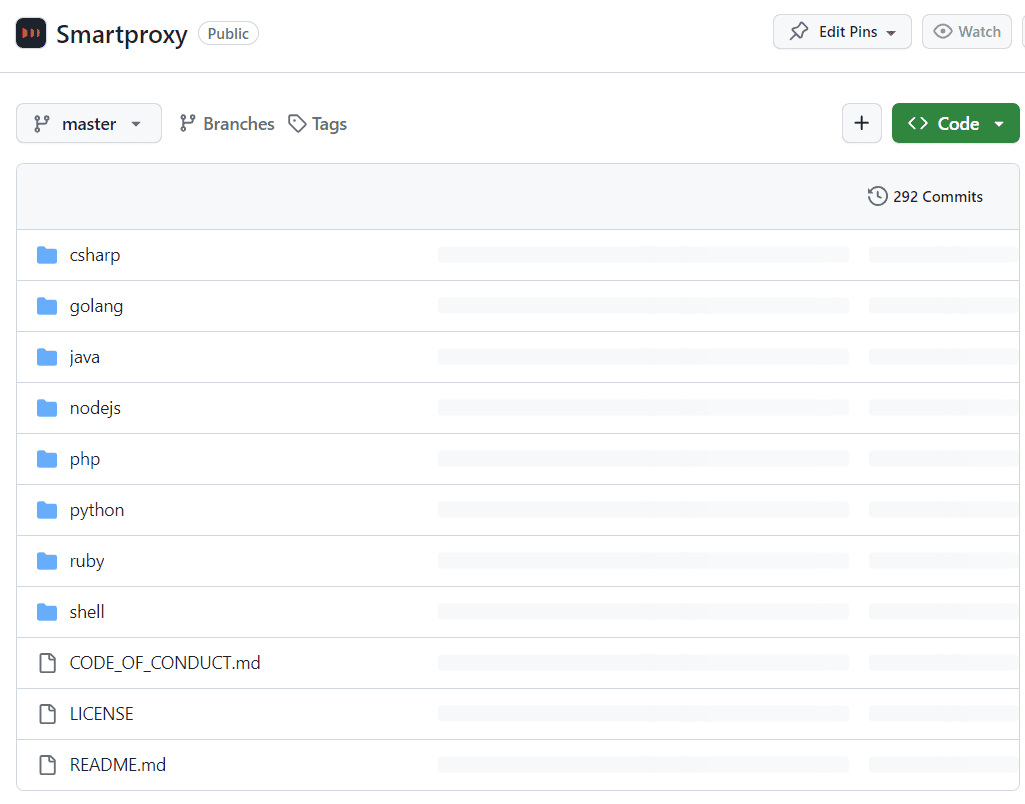
Every project is located in its dedicated repository. It’s a page that holds all the information about the project, including its description, code files, versions, changelogs, licenses, contributors, the programming languages it uses, and much more. These items are what we’re looking for when scraping GitHub for information. Let’s take a look at some of the most valuable ones:
- Code files. The bread & butter of every repository that contains folders and files of the entire project. It allows anyone to see how the application works behind the scenes, view script files, and what logic they follow to make it all work.
- README. By default, all repositories are urged to have a README file. As the name implies, the file wants you to read it before proceeding further, as it contains all the required information about the project. It features a description, a step-by-step guide on setting up and launching the project, and other helpful information and tips.
- Forks & stars. GitHub isn’t quite a social media platform, but if it had likes and shares, these would be the equivalent. Stars are simply a way for people to bookmark or support the project – the more stars it has, the more popular it is, proving that the code is useful and valuable for many. Forks represented how many times the repository was forked. In other words, it shows how many clone repositories exist that used it as a base to kick off their project or build, update, or fix something in the original.
- Issues & pull requests. If you’ve ever worked on a software project in a team, you’ll know that most communication is complaining, arguing, and fixing code. That’s exactly what GitHub offers, so developers can feel right at home. The issues section allows people to submit tickets with problems they face for the contributors to fix. A more helpful bunch takes matters into their own hands and submits pull requests instead. These are requests to accept their change to a part of a code that would fix or improve it somehow.
All in all, GitHub offers an immense amount of technical data that can be incredibly valuable. From big companies to individual projects, there’s helpful information in every repository. Let’s learn how to effectively gather and analyze this data for your business or personal needs.
Choosing the right tools
There are many tools available for scraping GitHub. You may choose a standard Requests + Beautiful Soup combo or an all-in-one solution like Scrapy. There are also open-source projects like github3.py that provide an enhanced way of interacting with the GitHub API. This guide will only look closely at a couple of these methods, but keep in mind that the tool you choose is entirely up to your personal choice, requirements, and the features available.
Requests with Beautiful Soup
Requests and Beautiful Soup might be familiar names if you've tried web scraping. They’re among the most popular Python libraries available, offering simple syntax with powerful capabilities to make requests to a website and effectively scrape and parse information from it. Here’s a code example of how you can parse the HTML of any repository you want:
import requestsfrom bs4 import BeautifulSoupurl = 'https://github.com/Smartproxy/Smartproxy'page = requests.get(url)soup = BeautifulSoup(page.text, 'html.parser')print(soup.contents)
The script will print the entire HTML of the page into your console. To be more precise, you can take advantage of Beautiful Soup’s various methods, such as find(). Here’s an example of how to extract only the About section:
import requestsfrom bs4 import BeautifulSoupurl = 'https://github.com/Smartproxy/Smartproxy'page = requests.get(url)soup = BeautifulSoup(page.text, 'html.parser')about_section = soup.find(class_='f4 my-3')print(about_section.text)
This method will extract anything from a GitHub repository without issues. However, if you attempt to get one of the commit messages, you’ll run into the issue that the script returns None. To find out why, we can look at the website with JavaScript disabled. This is what it looks like:
The issue is that GitHub uses dynamic rendering for its content, meaning that not all information is present after the first request to the website. In a typical scenario, when using a web browser, the base of the website would be loaded first, and then, through the help of JavaScript, the rest of the information would be rendered. Unfortunately, there’s no way to tell our script to wait until everything’s loaded with just Requests and Beautiful Soup.
This method is the easiest to implement and can complete most scraping tasks. However, it comes with its limitations and might not be suitable for the ever-changing landscape of the dynamic web.
Selenium
To scrape dynamic content, you’ll need a tool to render the entire page before performing any scraping tasks. Selenium, a Python-based automation tool, is commonly used for web browser testing but can also be used to scrape dynamic web content. Its user-friendly interface makes it straightforward to use and begin with.
In the following sections, we’ll explore how to set up Selenium with Python to scrape data from a GitHub repository. If you’re looking for a solution based on JavaScript, you might also want to check out the Puppeteer or Playwright libraries as alternative options.
How do I scrape a GitHub repository?
To scrape any GitHub repository, you must know the fundamentals of inspecting a web page, seeing its HTML, and selecting the elements that contain the data you need. You’ll then need to set up and install a tool like Selenium, which you’ll use to write a script that will load the website, extract the required data, and store it in an easy-to-read fashion.
Sounds like a lot to take in? No worries, as we’ll go through each of these points step-by-step. By the end of this guide, you’ll be able to write and modify your own Selenium scripts to scrape any GitHub data you want.
Setting up your environment
Let’s begin with installing Selenium to use it for our project. Ensure you have Python installed alongside the pip packet manager on your computer. Then, in your Terminal tool, enter the following commands:
pip install seleniumpip install beautifulsoup4
The first command will download and install the latest version of Selenium and its dependencies. The second command will install the already familiar Beautiful Soup library – it’s too valuable to pass up when scraping the web. Selenium also requires a WebDriver to interact with web browsers. You need to download the appropriate WebDriver for your intended browser. Selenium supports various web browsers like Chrome, Firefox, Safari, etc. You can find the WebDrivers in the following links:
Finally, let’s run a simple script to check if both Selenium and the WebDrivers were installed correctly. Create a new Python example_file.py that contains this code:
from selenium import webdriverdriver = webdriver.Chrome() # Or webdriver.Firefox(), depending on your browser choicedriver.get("https://www.example.com")print(driver.title)driver.quit()
To execute the script, open your Terminal tool, navigate to the directory where your file is located (using the cd command), and type:
python example_file.py
You should see a browser window appear and load the page for a brief moment. Afterward, it should print the web page's title in your Terminal window. In this example, you should see Example Domain. You may test it with different web pages and see if it returns the titles correctly. If so, Selenium was set up correctly!
How to build a GitHub scraper?
Let’s repeat the previous example with Requests and Beautiful Soup and grab the About section from Smartproxy’s main repository. You’ll have to import a few more webdriver libraries and Beautiful Soup. Here’s the code:
from selenium import webdriverfrom selenium.webdriver.chrome.service import Servicefrom webdriver_manager.chrome import ChromeDriverManagerfrom bs4 import BeautifulSoup# Set up the Chrome WebDriverservice = Service(ChromeDriverManager().install())driver = webdriver.Chrome(service=service)# URL of the web pageurl = "https://github.com/Smartproxy/Smartproxy"# Open the web pagedriver.get(url)# Get the page HTML sourcepage_source = driver.page_source# Parse the HTML using BeautifulSoupsoup = BeautifulSoup(page_source, "html.parser")# Find the element with the specified class nameabout_element = soup.find(class_="f4 my-3")about_text = about_element.text.strip()# Print the About section contentprint(about_text)# Close the browserdriver.quit()
The script opens the web page, gets the HTML content, parses it, and then uses Beautiful Soup’s find() method to extract the element that matches the class provided. You can further modify the code to extract different elements based on their class, parent elements, or location on the page. With the right prompts, you can extract almost any data from a GitHub repository!
You may wonder how this differs from the usual Requests and Beautiful Soup script. In a way, it performs the same process and returns the same result. However, Selenium has one advantage we haven’t touched yet – the ability to render dynamic content. Since the About section isn’t loaded dynamically, there’s no difference between using either method. Rendered content, such as commit messages, will require Selenium’s ability to wait until it’s loaded and only then get the content from the page.
Advanced techniques
You’ll need to add a delay to your script to scrape dynamic content. Let’s try to scrape the commit messages by adding an implicitly_wait() method that will wait 10 seconds for the JavaScript to render. We’re also using the selenium-wire tool, which extends the functionalities of the regular Selenium WebDriver. Then, it will loop through the commit messages and print them all in the Terminal:
from seleniumwire import webdriverfrom selenium.webdriver.chrome.service import Servicefrom webdriver_manager.chrome import ChromeDriverManagerfrom bs4 import BeautifulSoupservice = Service(ChromeDriverManager().install())driver = webdriver.Chrome(service=service)# URL of the web pageurl = "https://github.com/Smartproxy/Smartproxy"# Open the web pagedriver.get(url)# Set an implicit wait time to wait for JavaScript to renderdriver.implicitly_wait(10) # Wait for 10 seconds# Get the page HTML sourcepage_source = driver.page_source# Parse the HTML using BeautifulSoupsoup = BeautifulSoup(page_source, "html.parser")# Find all elements with the class "react-directory-commit-message"commit_messages = soup.find_all(class_="react-directory-commit-message")# Loop through the results and print themfor commit_message in commit_messages:print(commit_message.text.strip())
Like magic, Selenium loads the web page, waits until it’s fully loaded, and gets the required information.
One more thing to remember: repetitive requests from the same IP address can lead to you getting blocked or rate-limited by GitHub. This is especially relevant when trying to scrape several repositories simultaneously. Thankfully, Smartproxy offers proxies to help you overcome these issues with ease.
A proxy server is an intermediary between you and your target. It takes your request, re-routes it to a different location with a different IP address, and makes the request on your behalf. This way, your activity remains completely anonymous, as every request you make will appear from a different IP address. You can then make as many requests as possible without worrying about limitations!
To include Smartproxy proxies, such as residential proxies, in your script, grab the authentication and endpoint information from the dashboard. Then, enter your credentials and endpoint:port information in your script like so:
from seleniumwire import webdriverfrom selenium.webdriver.chrome.service import Servicefrom webdriver_manager.chrome import ChromeDriverManagerfrom bs4 import BeautifulSoup# Selenium Wire configuration to use a proxyproxy_username = 'user'proxy_password = 'pass'seleniumwire_options = {'proxy': {'http': f'http://{proxy_username}:{proxy_password}@endpoint:port','verify_ssl': False,},}service = Service(ChromeDriverManager().install())driver = webdriver.Chrome(service=service, seleniumwire_options=seleniumwire_options)# URL of the web pageurl = "https://github.com/Smartproxy/Smartproxy"# Open the web pagedriver.get(url)# Set an implicit wait time to wait for JavaScript to renderdriver.implicitly_wait(10) # Wait for 10 seconds# Get the page HTML sourcepage_source = driver.page_source# Parse the HTML using BeautifulSoupsoup = BeautifulSoup(page_source, "html.parser")# Find all elements with the class "react-directory-commit-message"commit_messages = soup.find_all(class_="react-directory-commit-message")# Loop through the results and print themfor commit_message in commit_messages:print(commit_message.text.strip())
Replace the user, pass, endpoint, and port with your credentials and information. Just like that, you’ve made a request to a GitHub repository through a proxy server.
Final words
In this article, you’ve learned how to build your GitHub repository scraper. Whether you use Requests and Beautiful Soup or build a more complex tool with Selenium, you’ll be able to extract any data you want by using the code examples and modifying them based on your own needs. As GitHub is a knowledge-sharing community, we highly encourage you to not only gather data from it but also contribute to many projects in return. You could even share what kind of project you’ve built using this guide and help many developers worldwide.
If you aren’t very familiar with coding and are looking for a more straightforward tool, try the Smartproxy Web Scraping API. It’s easy to use, takes seconds to set up, and can make requests to any GitHub repository or website and return the content you want.
About the author

Zilvinas Tamulis
Technical Copywriter
A technical writer with over 4 years of experience, Žilvinas blends his studies in Multimedia & Computer Design with practical expertise in creating user manuals, guides, and technical documentation. His work includes developing web projects used by hundreds daily, drawing from hands-on experience with JavaScript, PHP, and Python.
Connect with Žilvinas via LinkedIn
All information on Smartproxy Blog is provided on an as is basis and for informational purposes only. We make no representation and disclaim all liability with respect to your use of any information contained on Smartproxy Blog or any third-party websites that may belinked therein.