


How to Set up Residential Proxies for VMLogin
Learn how to set up residential proxies on VMLogin.
14-day money-back option

How to Set up Residential Proxies for VMLogin:
1. Get VMLogin app
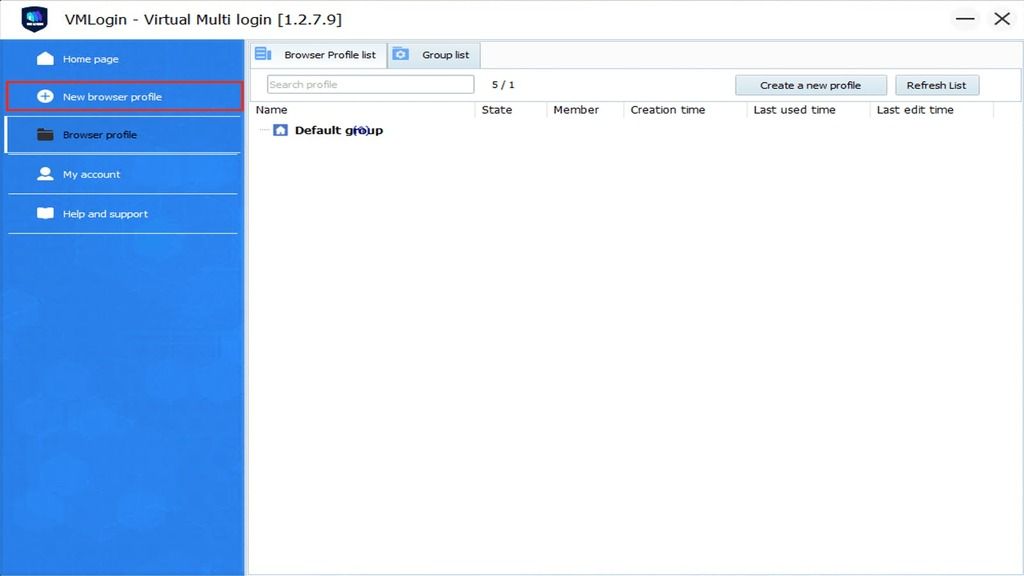
2. Open VMLogin and click on the New Browser profile.
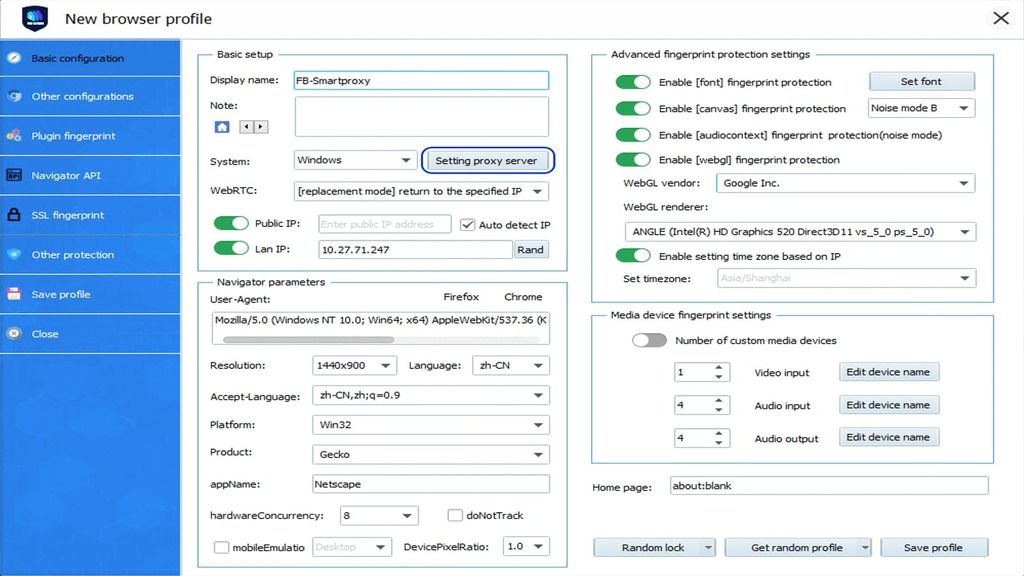
3. Click on the Setting proxy server button.
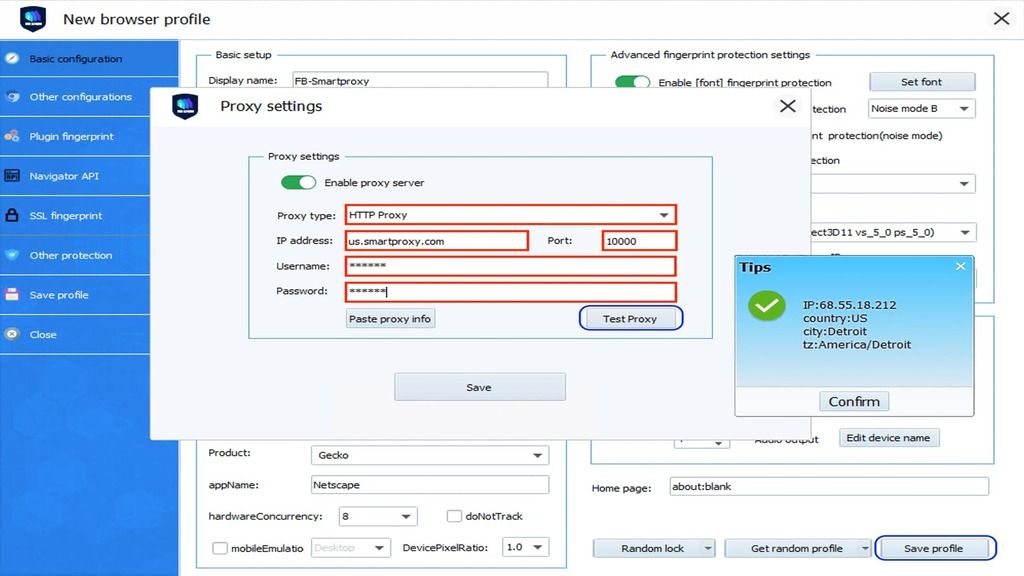
4. Select the HTTP proxy in the drop-down menu.
5. Enter your proxy details (e.g., us.smartproxy.com:10000) and your sub-user username and password as in the example below. If your IP is whitelisted, you don’t need to enter your username and password. Click on the Test proxy to see if the setup was successful. Then hit Save.
6. Set other profile’s fingerprint information and press Save profile.
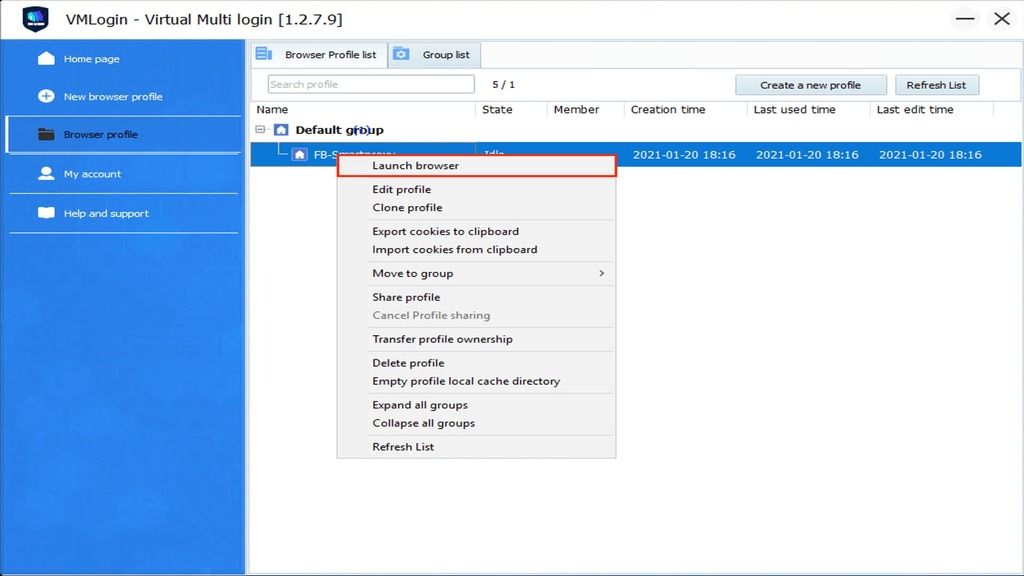
7. Right-click on your newly created profile and select Launch browser.
That’s it, you’re good to go!
Choose Smartproxy:

Never get flagged
Avoid getting detected by using our vast pool of residential exit nodes.

Unlimited connections
Use any shoe bot with an unlimited number of connections, threads, and countries at once.

City and Country level targeting
Use residential IPs from as many countries or cities as you like. Change locations as often as needed.

Be aware that any tools mentioned in this article belong to a third party, not Smartproxy. Therefore, Smartproxy will not be responsible for any of the services offered by the third-party. Make sure to thoroughly review the third-party’s policies and practices, or do your due diligence, before using or accessing any of their services.