


How to Set up Residential Proxies for Scrapy Proxy Middleware
Learn how to set up residential proxies on Scrapy Proxy Middleware.
14-day money-back option

Scrapy Proxy Middleware integration:
1. Open Terminal window.
2. Navigate to the main directory of your project folder using:
cd yourprojectname
3. Download our proxy middleware using the following command:
C:\Users>cd smartproxyC:\Users\smartproxy>curl https://raw.githubusercontent.com/Smartproxy/Scrapy-Middleware/master/smartproxy_auth.py > smartproxy auth.py_
curl https://raw.githubusercontent.com/Smartproxy/Scrapy-Middleware/master/smartproxy_auth.py > smartproxy_auth.py
4. You should now see your project folder populated with smartproxy_auth.py file.

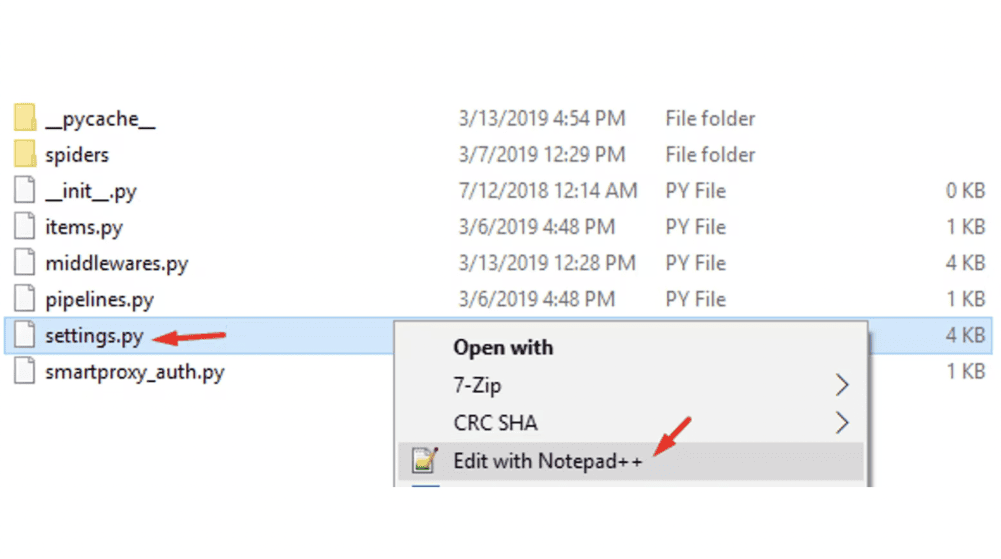
5. Using a file manager, navigate to your project folder, you should see settings.py file located at the bottom of the directory.
6. Edit the settings.py file using an editor of your choice.
7. Add the following properties at the bottom:
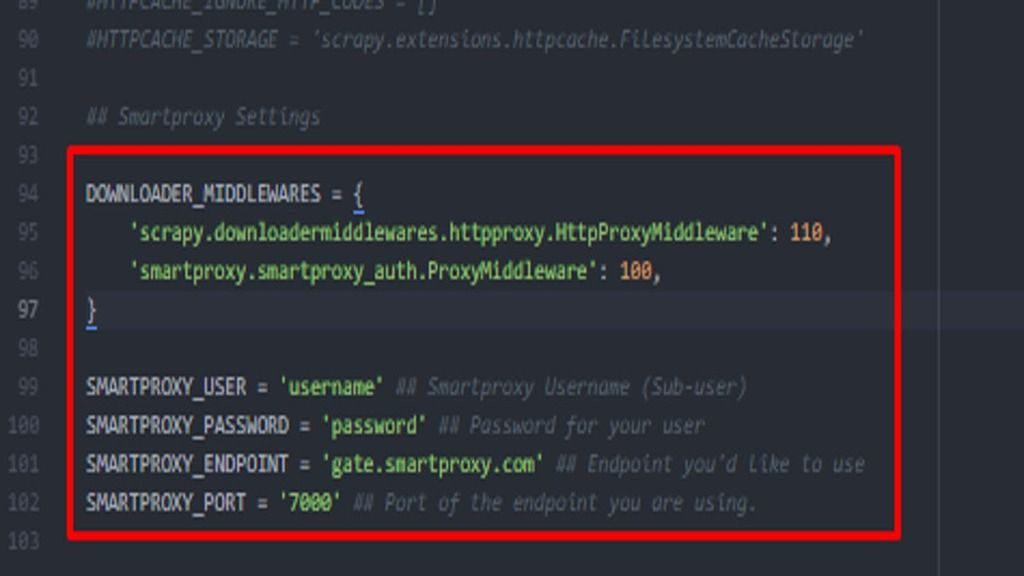
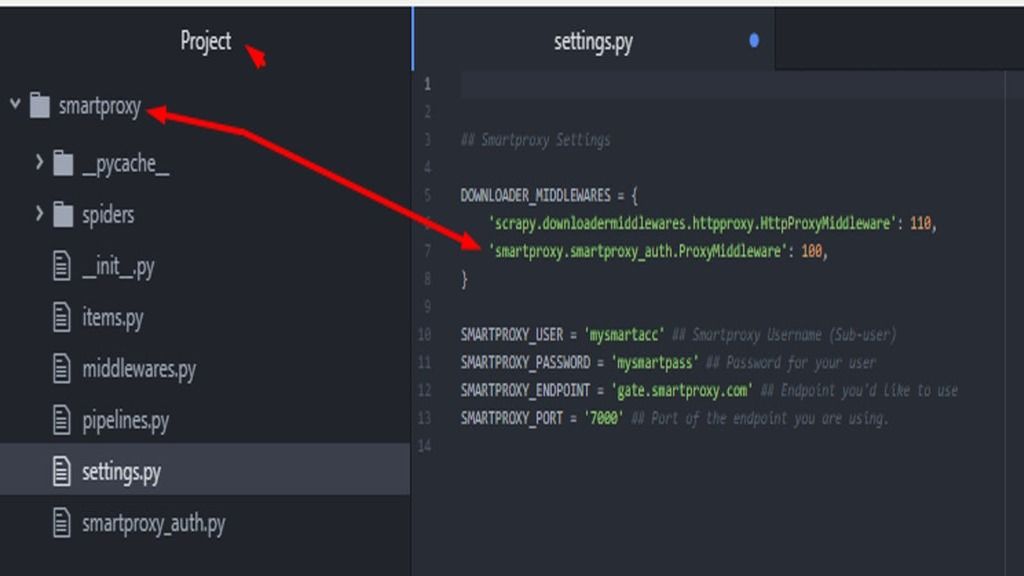
DOWNLOADER_MIDDLEWARES = {'scrapy.downloadermiddlewares.httpproxy. HttpProxyMiddleware': 110,'yourprojectname.smartproxy_auth. ProxyMiddleware': 100,}SMARTPROXY_USER = 'username' ## Smartproxy Username (Sub-user)SMARTPROXY_PASSWORD = 'password' ## Password for your userSMARTPROXY_ENDPOINT = 'gate.smartproxy.com' ## Endpoint you'd like to useSMARTPROXY_PORT = '7000' ## Port of the endpoint you are using.
8. In DOWNLOADER_MIDDLEWARES change yourprojectname line to the name of your project.
9. Make sure that you enter your details account details as well as proxy details within punctuation marks ('').
10. Save the file.
To find more information about the setup, make sure to visit our Github Page.
Choose Smartproxy:

Never get flagged
Avoid getting detected by using our vast pool of residential exit nodes.

Unlimited connections
Use any shoe bot with an unlimited number of connections, threads, and countries at once.

City and Country level targeting
Use residential IPs from as many countries or cities as you like. Change locations as often as needed.

Be aware that any tools mentioned in this article belong to a third party, not Smartproxy. Therefore, Smartproxy will not be responsible for any of the services offered by the third-party. Make sure to thoroughly review the third-party’s policies and practices, or do your due diligence, before using or accessing any of their services.