How To Set Up Your Proxies with Maskfog
Pair Maskfog and Smartproxy's proxies to enhance your online anonymity, manage multiple social media accounts, and break free from geographical restrictions.
What is Maskfog?

Maskfog is a powerful virtual anti-detect browser equipped with advanced features tailored for multi-accounting tasks. Users can leverage full fingerprint customization, crawl various web pages, and avoid CAPTCHAs or IP bans.
Why residential proxies?

Smartproxy's residential proxies offer a massive pool of over 55 million IPs across 195+ global locations. When integrated with Maskfog, handling multiple accounts and switching between various browser profiles becomes an easy task.
Apart from using residential proxies for multi-accounting, users can harness ‘em for activities such as web scraping, overcoming geo-restrictions, monitoring retail price changes, protecting their brand, and various AdTech tasks. As these IPs are sourced from real household devices connected to local networks, targets identify residential proxies as genuine users.
Set up Smartproxy’s proxies with Maskfog
First things first – download the anti-detect browser from the Maskfog website. The browser supports Windows and MacOS operating systems. After you’ve installed the app, and create an account. The user-friendly browser interface will guide you through the whole process, and in case you run into any problems, there’s a support chat and email ready to help you out.
Integration with residential proxies
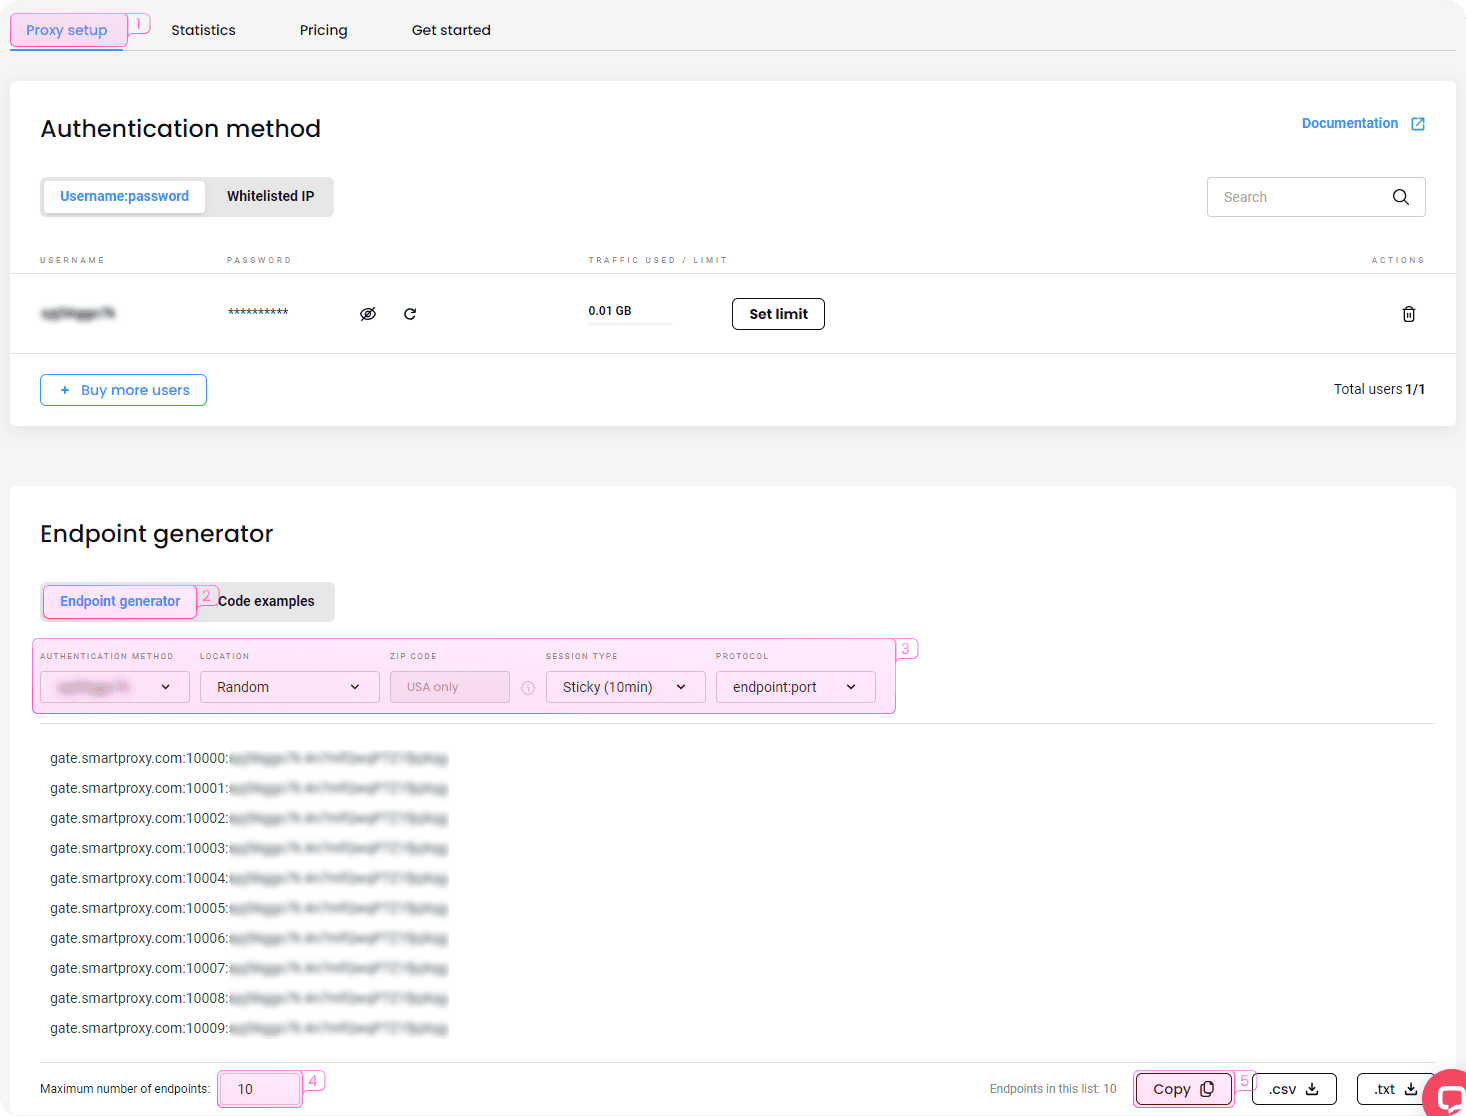
Maskfog integration with residential proxies is as easy as 1-2-3. For starters, head over to the Smartproxy dashboard:
- Open the proxy setup tab.
- Navigate to the Endpoint generator.
- Configure the parameters. Set your authentication method, location, and session type.
- Select the number of proxy endpoints you want to generate (default – 10).
- Copy the endpoints.
Pairing proxies with Maskfog
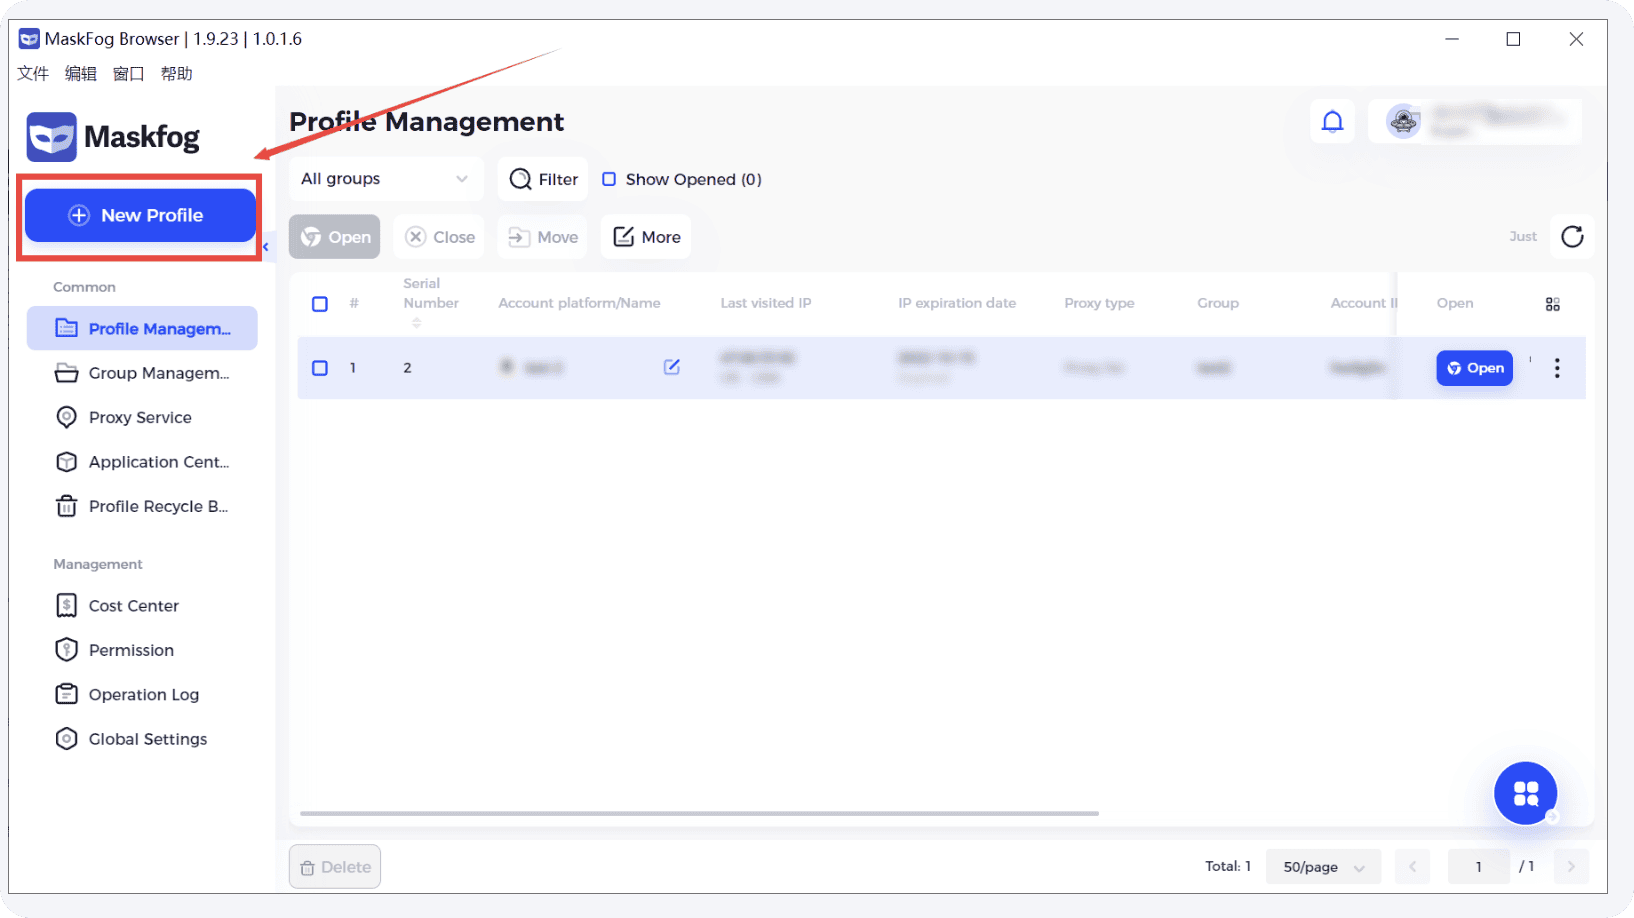
First, you’ll need to create a new browser profile. In the main Maskfog window, follow these steps:
- Click on Profiles Management.
- Select New Profile.
3. Choose Single Import.
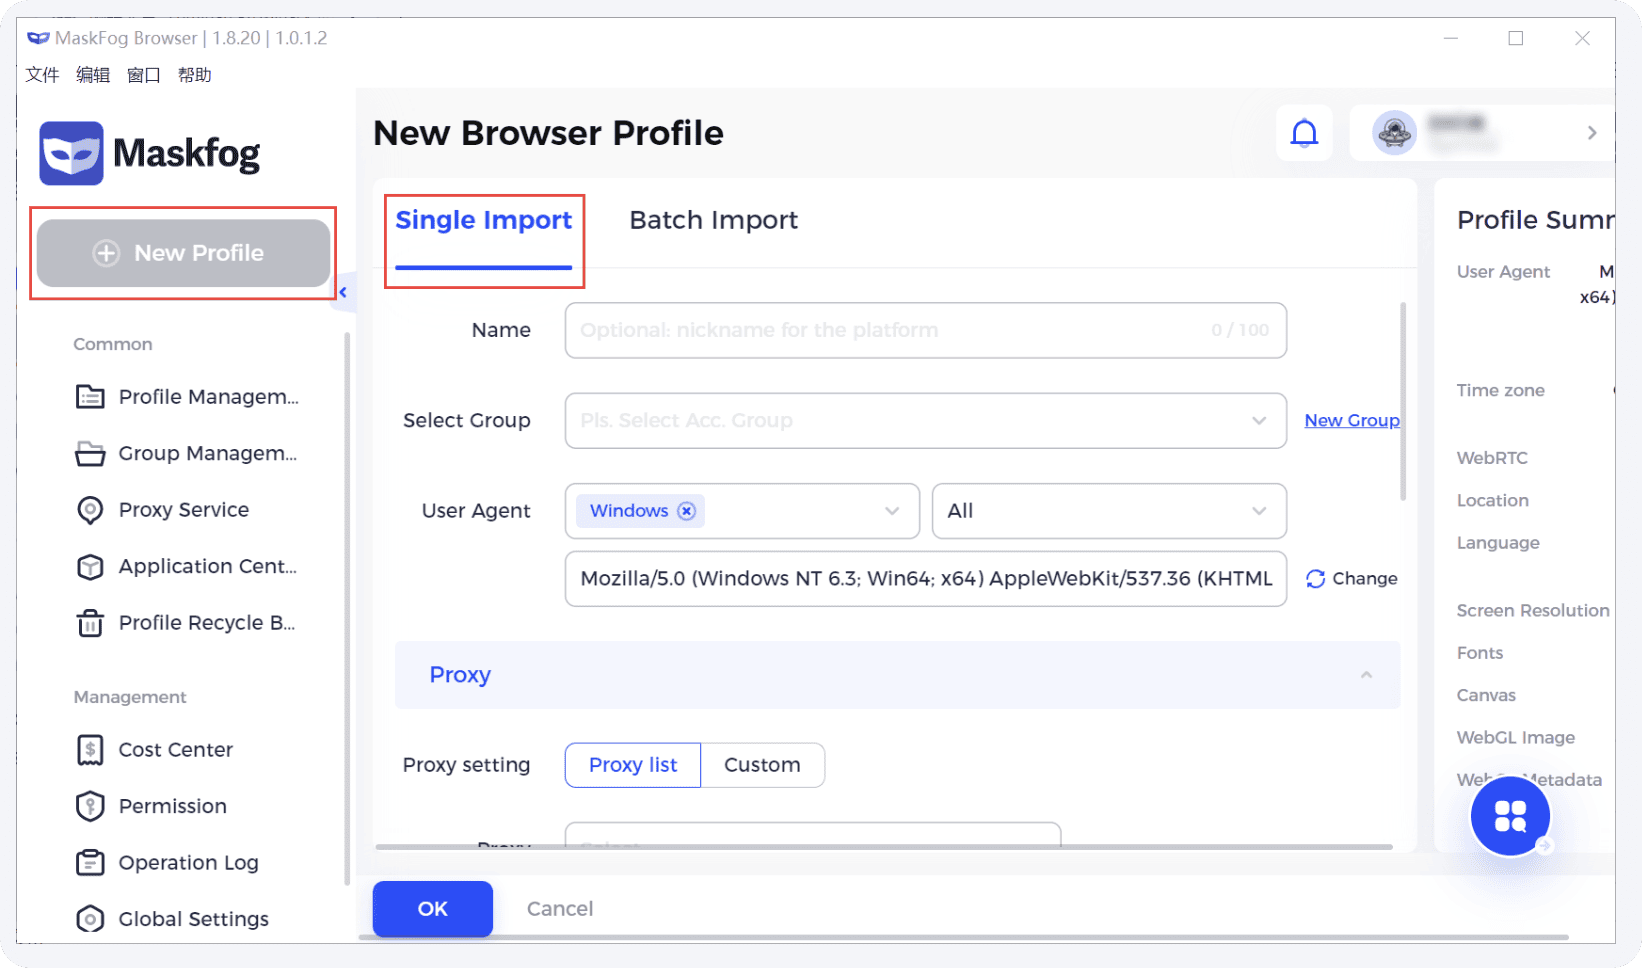
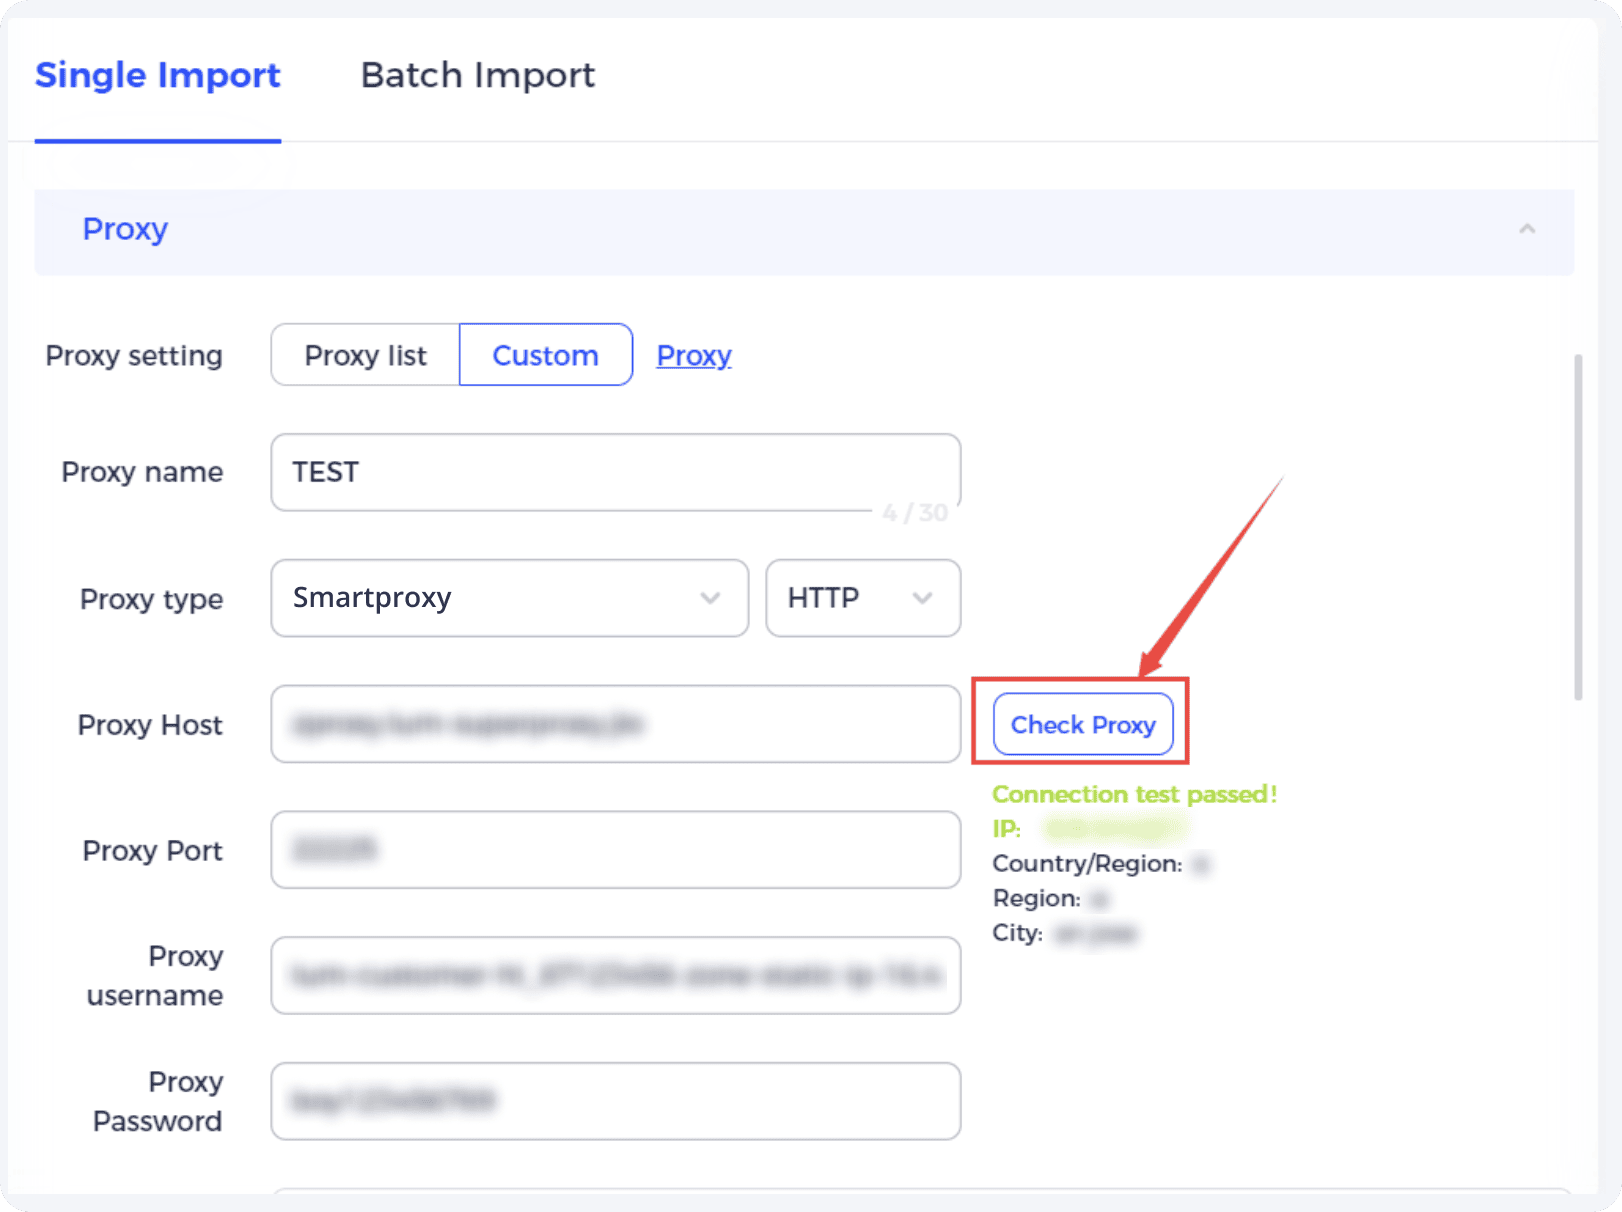
4. In the proxy configuration, select the Custom proxy method.
5. Select an account platform from the drop-down list. If you can’t find the Smartproxy domain, select Others, enter the Smartproxy domain yourself, or click Open a specified URL.
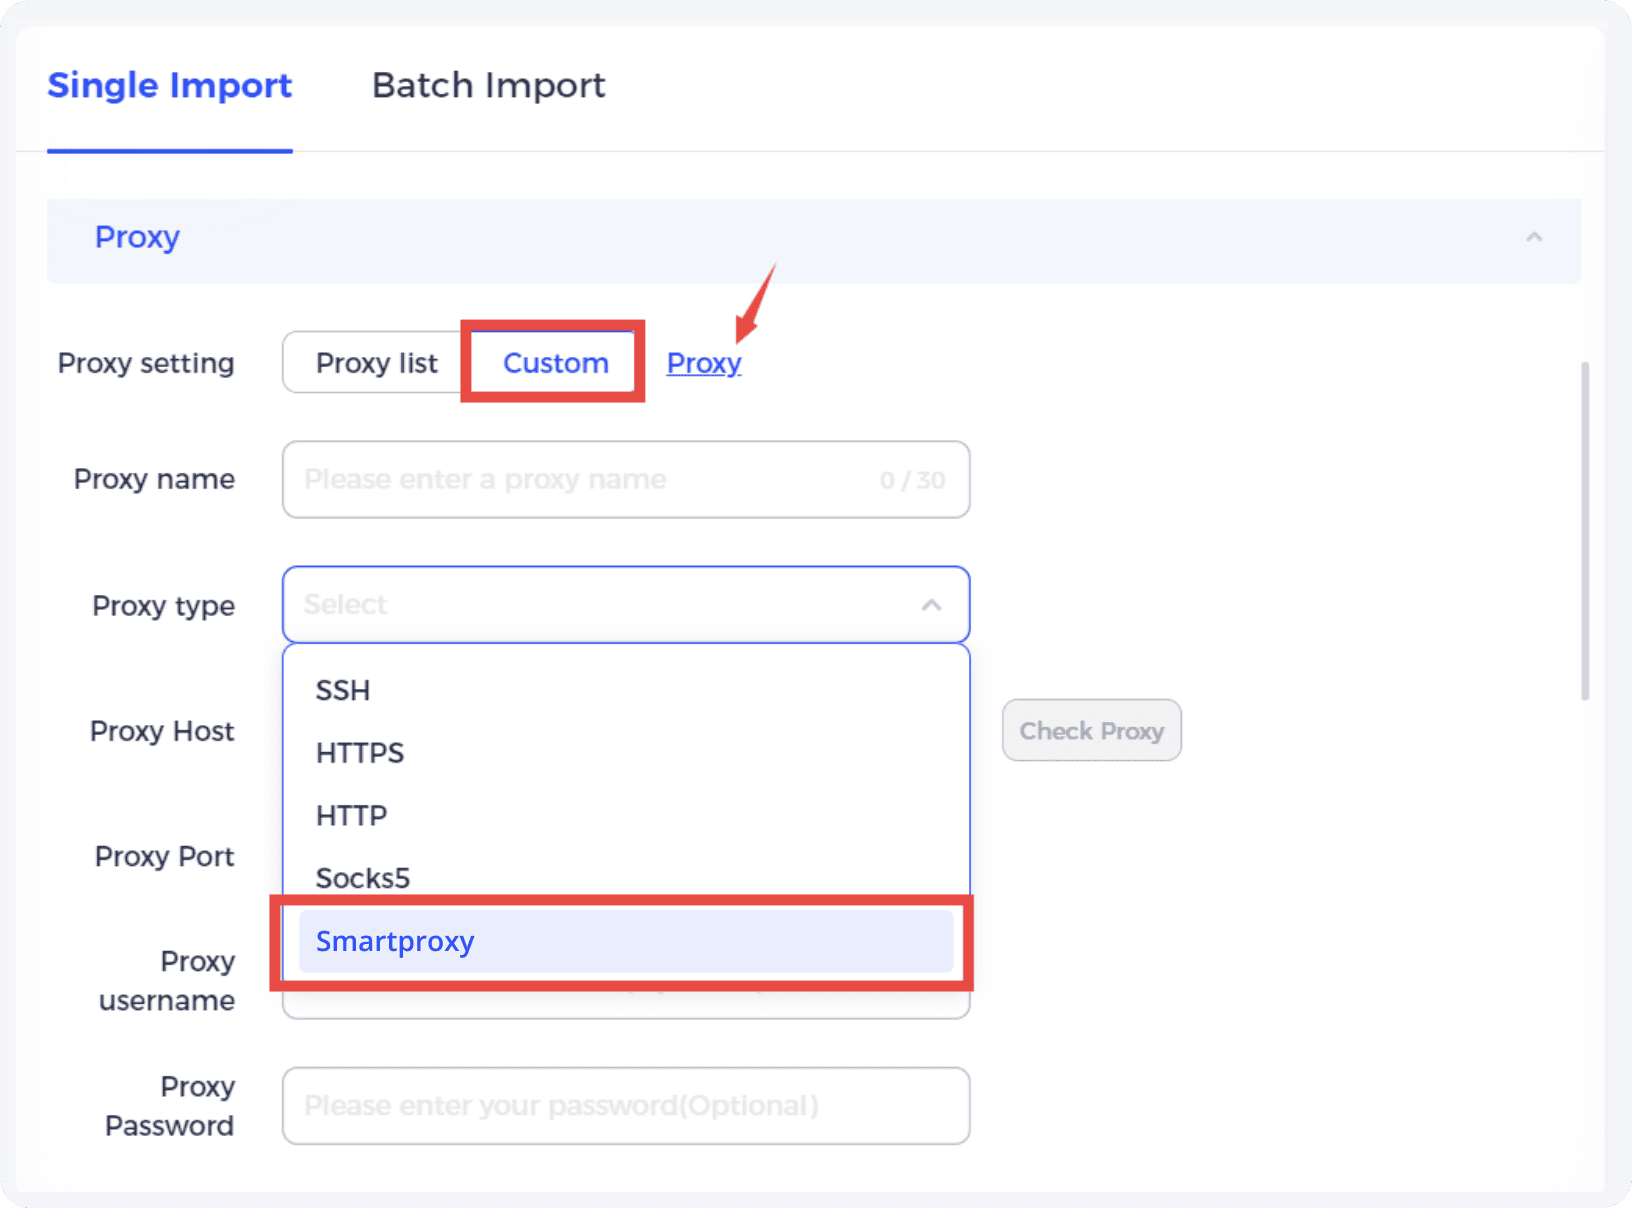
6. You’ll need to enter the proxy information. Once you’re all set with the residential proxy or datacenter proxy plan from Smartproxy, copy the proxy information and enter all the details.
Click Ok to save the profile, and you’re ready to go incognito.
Fastest residential proxies
Pick a plan that suits you. Get ahead with unblockable and stable proxies.
8 GB
$5.5
$2.75/ GB
Total:$44$22 + VAT billed monthly
Use discount code - RESI50
25 GB
$5.2
$2.6/ GB
Total:$130$65 + VAT billed monthly
Use discount code - RESI50
50 GB
$4.9
$2.45/ GB
Total:$245$123 + VAT billed monthly
Use discount code - RESI50
100 GB
$4.5
$2.25/ GB
Total:$450$225 + VAT billed monthly
Use discount code - RESI50
With each plan you access
55M+ ethically-sourced IPs
HTTPS & SOCKS5 support
<0.5s average response time
99.68% success rate
Unlimited threads & concurrent sessions
Country, state, city ASN & ZIP code targeting
Rotating and sticky sessions
#1 IP quality in the market
Free 24/7 tech support
SSL Secure Payment
Your information is protected by 256-bit SSL
Google Pay and Apple Pay are only available with Smart Wallet*
What people are saying about us
We're thrilled to have the support of our 50K+ clients and the industry's best

Best online Customer support I've gotten
Customer Support is amazing, agent walked me through an issue I've been dealing since...
Featured in:
Be aware that any tools mentioned in this article belong to a third party, not Smartproxy. Therefore, Smartproxy will not be responsible for any of the services offered by the third-party. Make sure to thoroughly review the third-party’s policies and practices, or do your due diligence, before using or accessing any of their services.


