


How to Set Up Your Proxies with ixBrowser
Utilize ixBrowser and Smartproxy's proxies to enhance your digital identity and easily manage multiple accounts without facing CAPTCHAs or IP bans.

65M+ IPs
195+ locations
Advanced proxy rotation
24/7 tech support
99.99% uptime
Unlimited connections & threads

What is ixBrowser?
ixBrowser is an anti-detect browser with advanced features designed for multi-accounting use case. This browser allows users to create custom fingerprints, store data from browser profiles, assign team member roles, manage cookies, and run various batch operations.
Why residential proxies?

Residential proxies by Smartproxy offer an extensive pool of over 55 million IPs spanning 195+ global locations. Integrating ixBrowser with our residential proxies will allow you to manage multiple accounts and juggle between different browser profiles without a single hassle.
Beyond multi-accounting, users can leverage residential proxies for web scraping, breaking through geo-restrictions, and managing eCommerce projects. The IPs are sourced from residential household devices, making them a reliable choice when you want to avoid CAPTCHAs or IP blocks.
Set up Smartproxy’s proxies with ixBrowser
To get things going, download the ixBrowser app from their website. After the download is finished, open the app and create an account. You won’t take long getting comfortable with ixBrowser, as the interface is simple, and all the features are easy to use. Plus, you can watch step-by-step video tutorials for pretty much every feature this anti-detect browser offers.
Integration with residential proxies
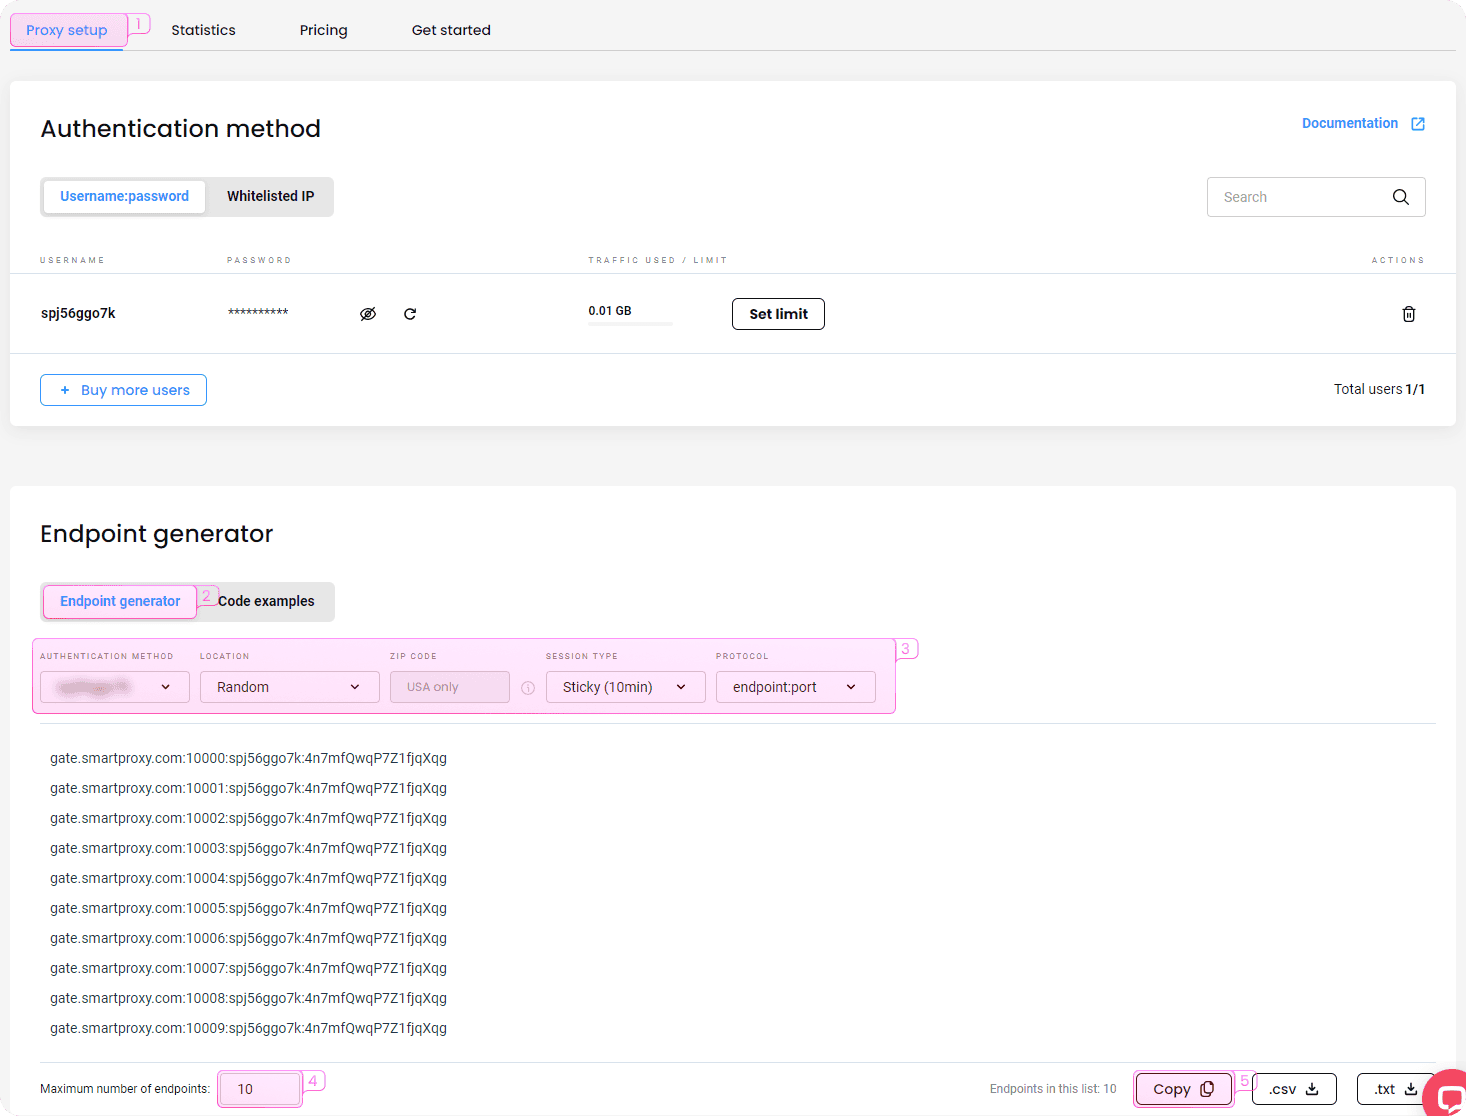
In just a few quick steps, start the proxies integration with ixBrowser:
- Open the proxy setup tab.
- Navigate to the Endpoint generator.
- Configure the parameters. Set your authentication method, location, and session type.
- Select the number of proxy endpoints you want to generate (default – 10).
- Copy the endpoints.
Integration with datacenter proxies
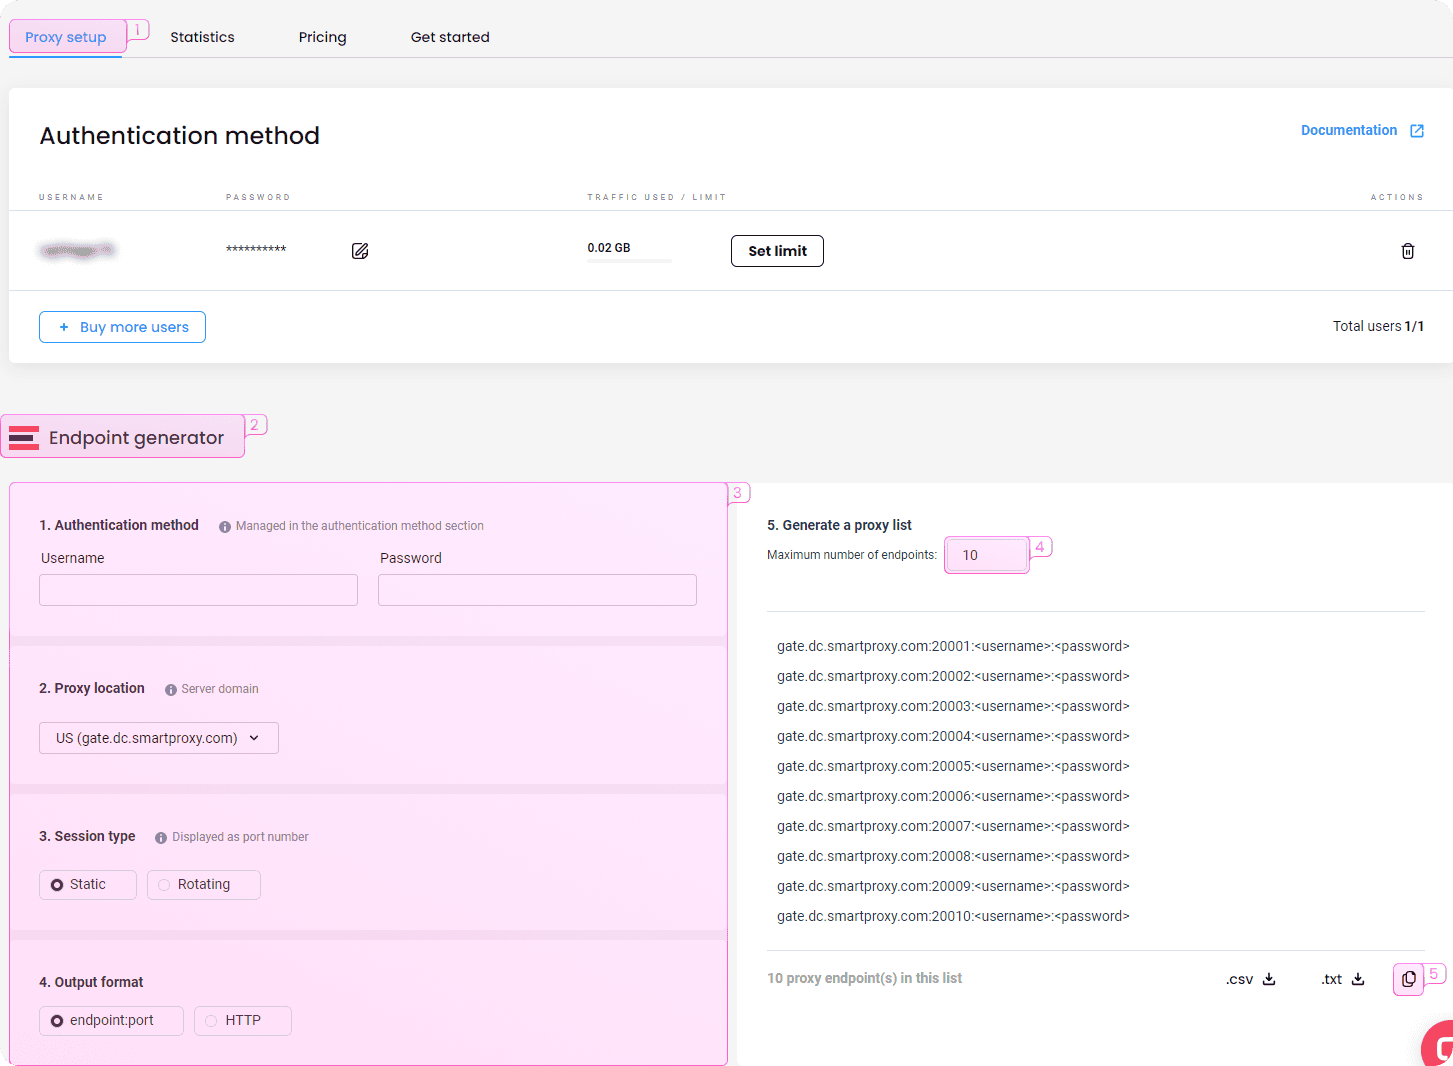
To integrate ixBrowser with Smartproxy datacenter proxies, follow these steps:
- Open the proxy setup tab.
- Navigate to the Endpoint generator.
- Configure the parameters according to your needs. Enter your credentials for the authentication method, and set a location and session type.
- Select the number of proxy endpoints you want to generate (default – 10).
- Copy the endpoints.
- In the main window, click the + Create Profile button.
- Choose the platform, group, and profile title, then click the Next step button.
- In the proxy configuration tab, set the proxy method to Custom and choose the supported proxy type.
- Once you have purchased the residential or datacenter proxy plan from Smartproxy, copy the proxy information to integrate the proxies directly into the browser profile. Once you’ve entered the proxy details, hit Create.
- After creating the profile with the proxy settings, click Open, and ixBrowser will start a session with the masked IP address.
Fastest residential proxies
Pick a plan that suits you. Get ahead with unblockable and stable proxies.


Featured in:


Be aware that any tools mentioned in this article belong to a third party, not Smartproxy. Therefore, Smartproxy will not be responsible for any of the services offered by the third-party. Make sure to thoroughly review the third-party’s policies and practices, or do your due diligence, before using or accessing any of their services.