How to Set up a Residential Proxy in the SwitchyOmega Extension
Find out how to set up a proxy in SwitchyOmega.
Hide your IP, access restricted content, and avoid geoblocking today.
14-day money-back option
SwitchyOmega proxy settings for Chrome and Firefox:
1. Download and install SwitchyOmega extension:
Configure SwitchyOmega extension on Chrome:
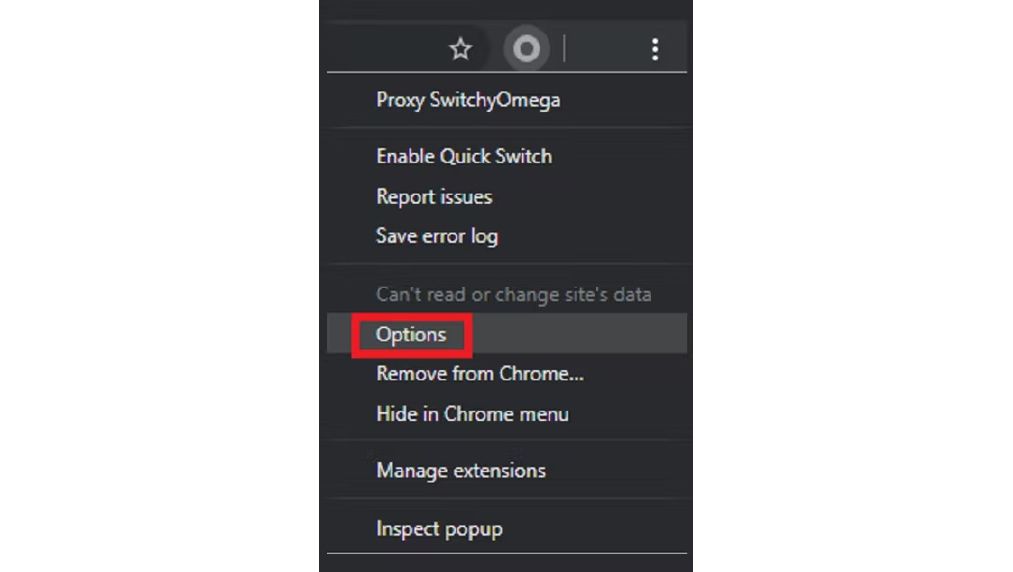
2. Click on SwitchyOmega icon in your browser and open Options.
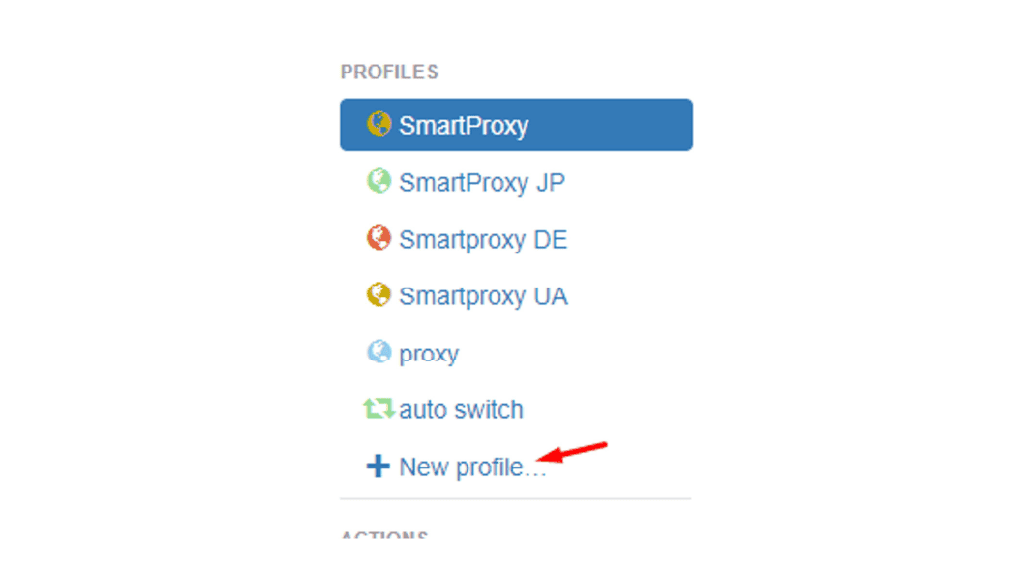
3. Click on New profile button in PROFILES tab.
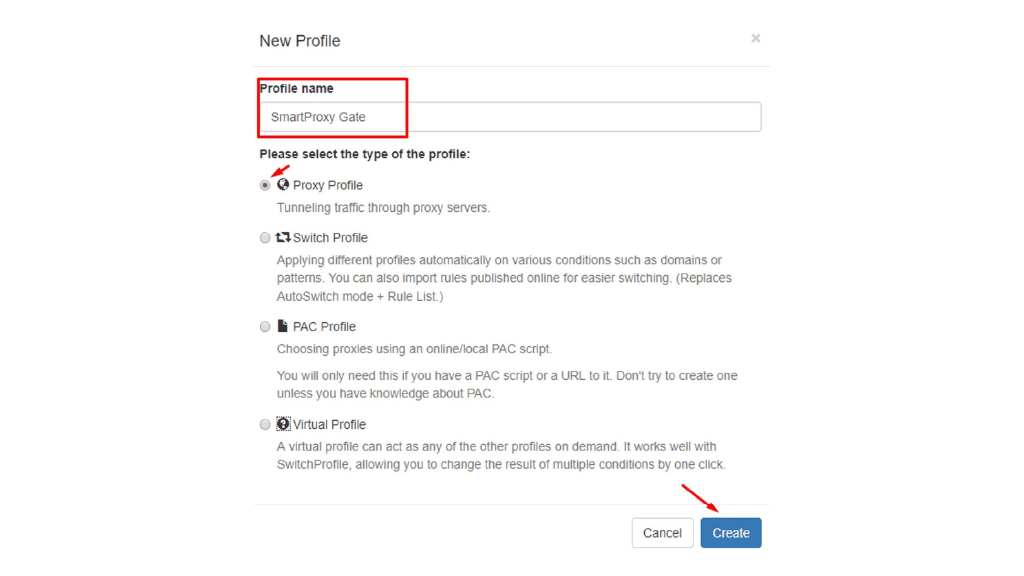
4. In the pop-up window, under Profile name write down the name you prefer. Select Proxy Profile option and hit Create button.
5. In the generated table, select HTTP under Protocol column.
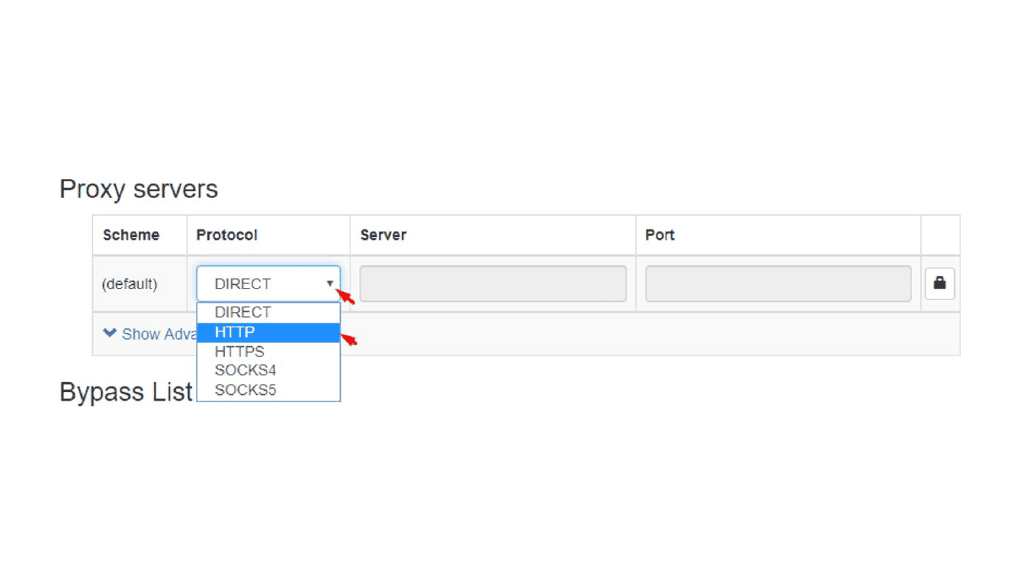
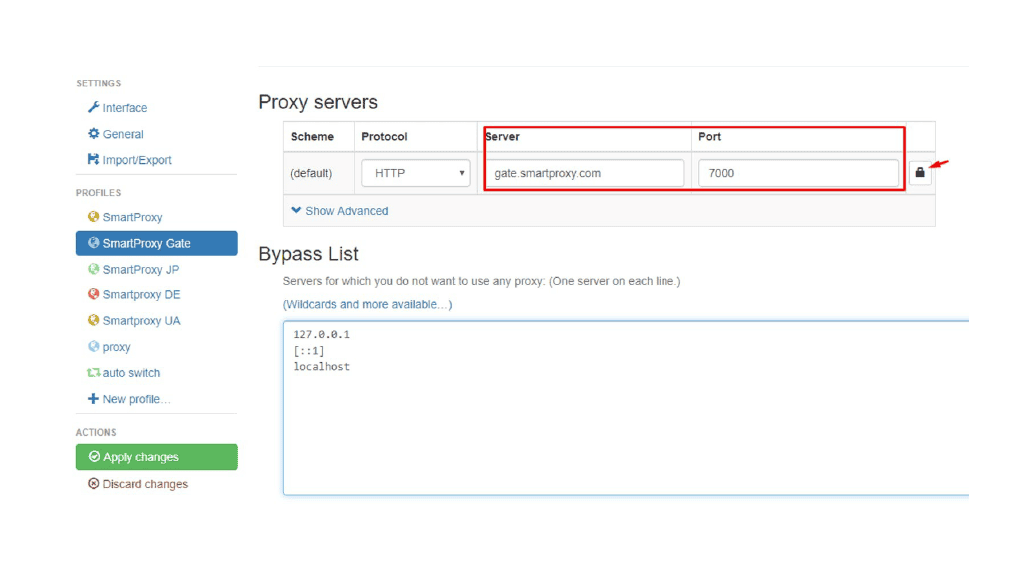
6. Type in your preferred endpoint details in Server and Port columns. If you are using a Whitelsited IP feature, skip to Step 7 of this tutorial. If not, click on the lock icon.
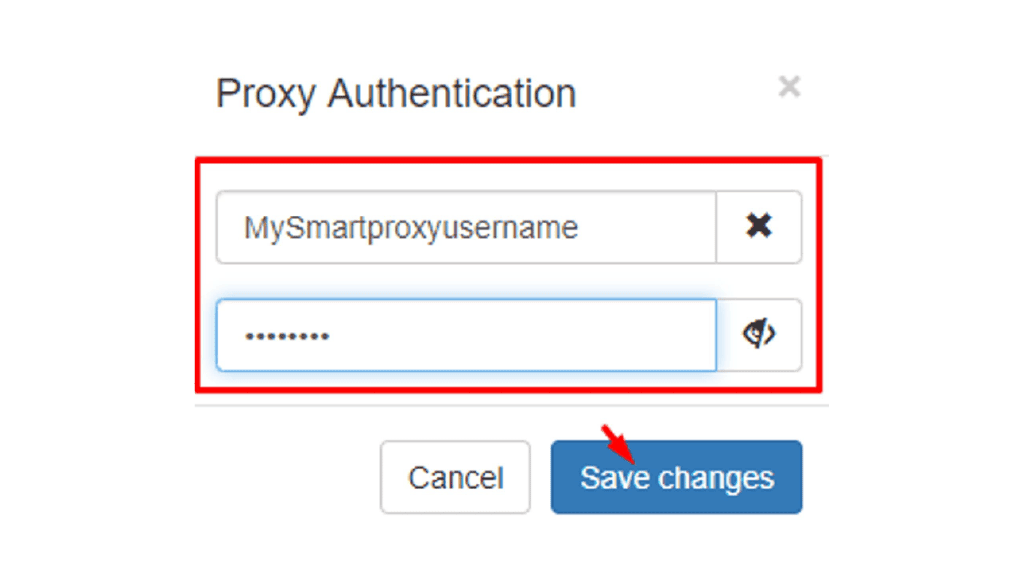
7. In the pop-up field type in your Username and Password and press Save changes button.
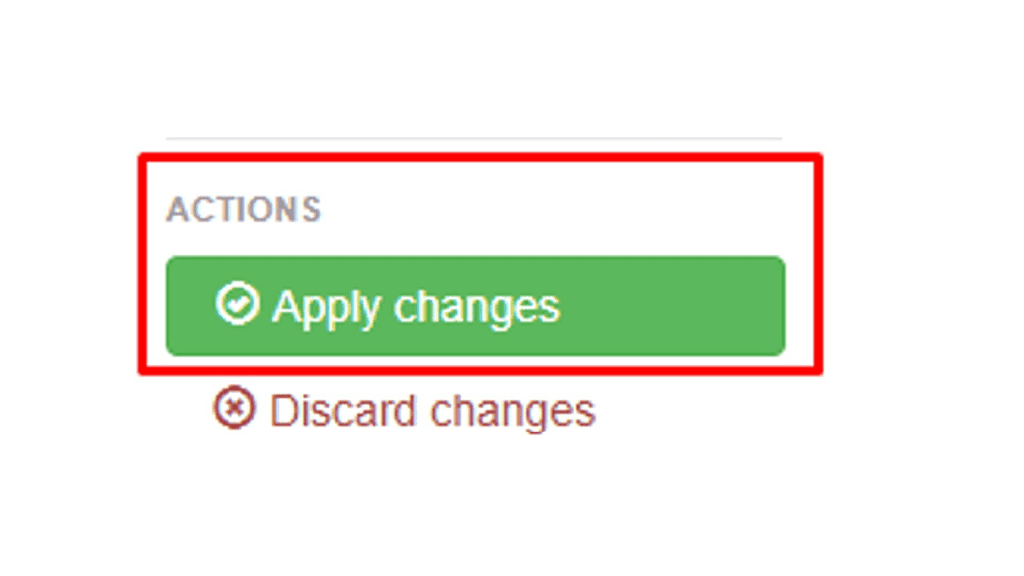
8. To apply settings and create a profile for your proxy, click Apply changes under Actions.
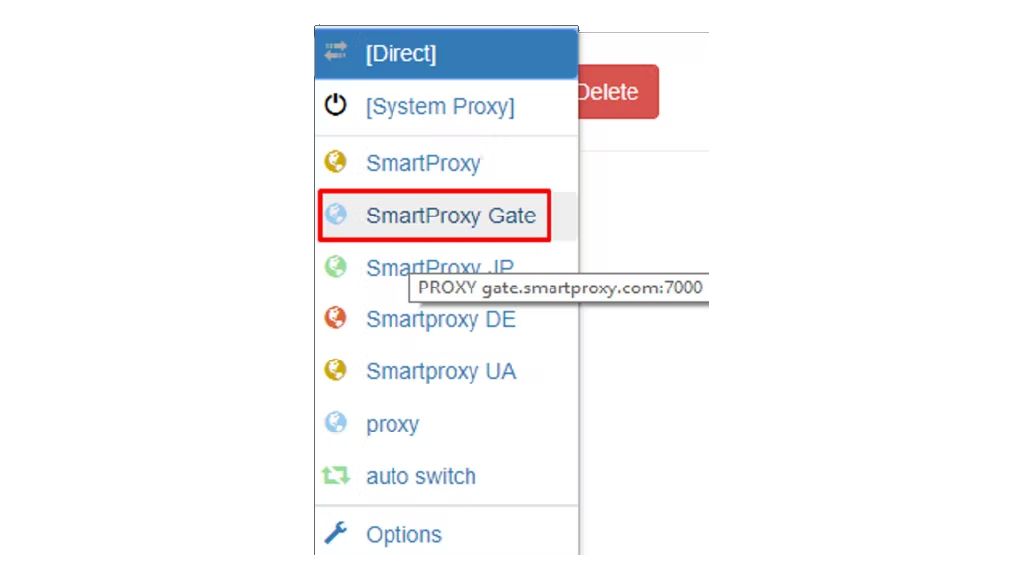
9. Your created profile should now appear in the proxy list as you access SwitchyOmega through the extension icon.
Choose Decodo:

Never get flagged
Avoid getting detected by using our vast pool of residential exit nodes.

Unlimited connections
Use an unlimited number of connections, threads and countries at once.

City and Country level targeting
Use residential IPs from as many countries or cities as you like. Change locations as often as needed.

