

- Smartproxy >
- FAQ >
- Configuration >
Internet Explorer
How to Set up a Residential Proxy in the Insomniac Browser
A step by step guide on how to set up a proxy in the Insomniac browser.
Use residential proxies to hide your IP and access geo-restricted content today! Contact us at [email protected].


.png?ixlib=gatsbyFP&auto=compress%2Cformat&fit=max&w=360&h=460)
Insomniac proxy settings:
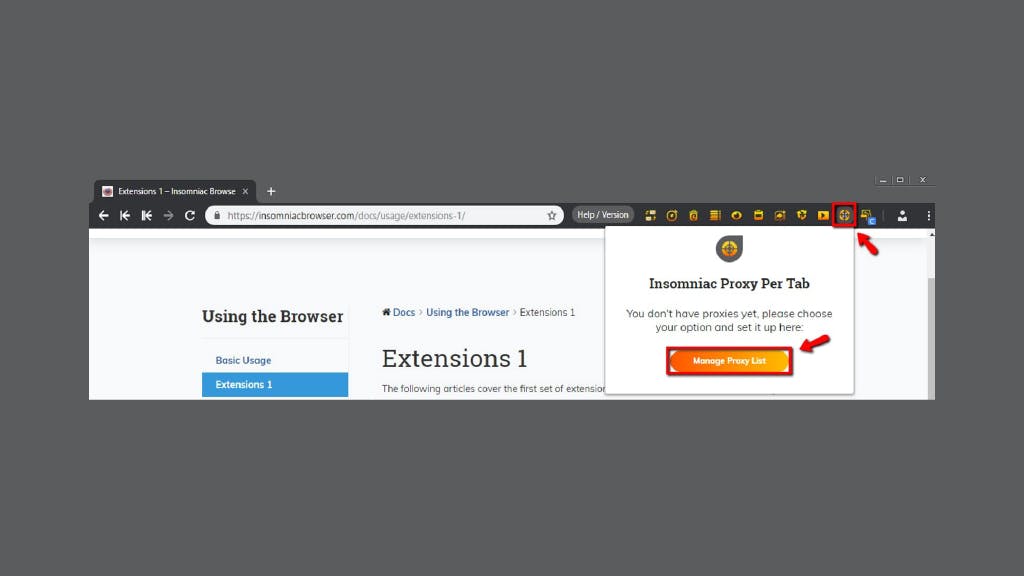
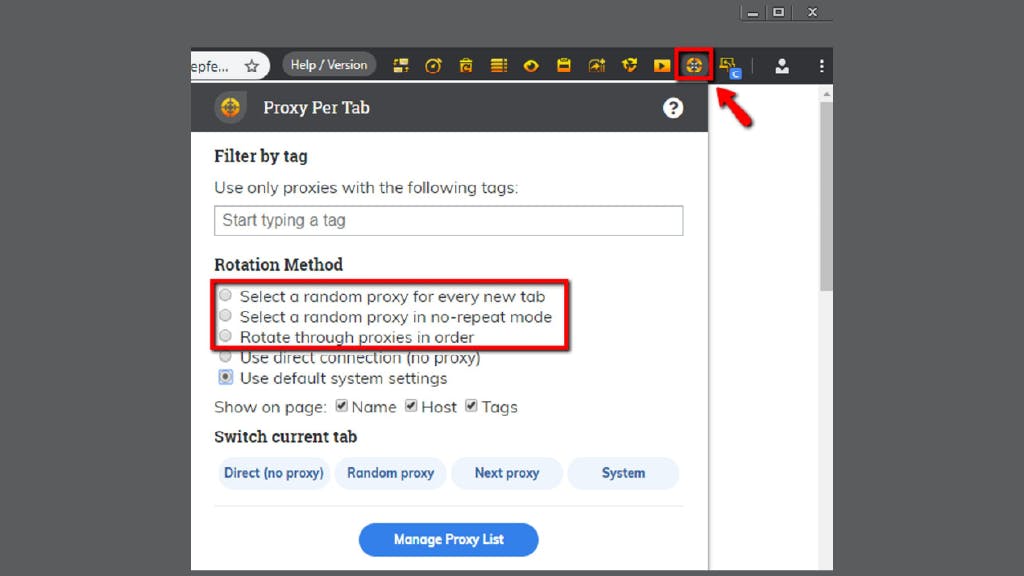
1. Open Insomniac browser and click on Insomniac Proxy Per Tab > Manage Proxy List


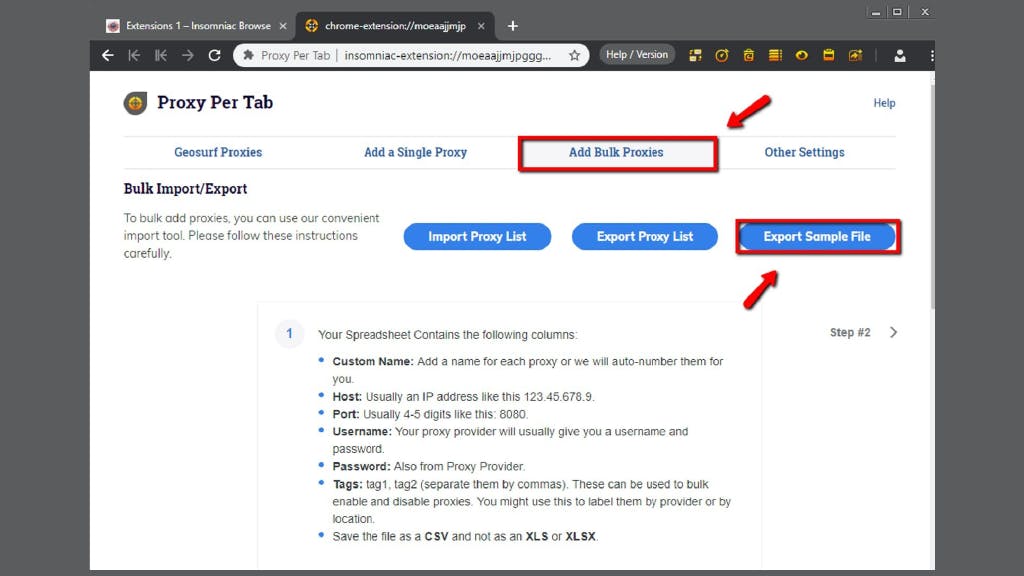
2. New tab will open. Select Add Bulk Proxies. You will need to generate a CSV file - select Export Sample File to download a template

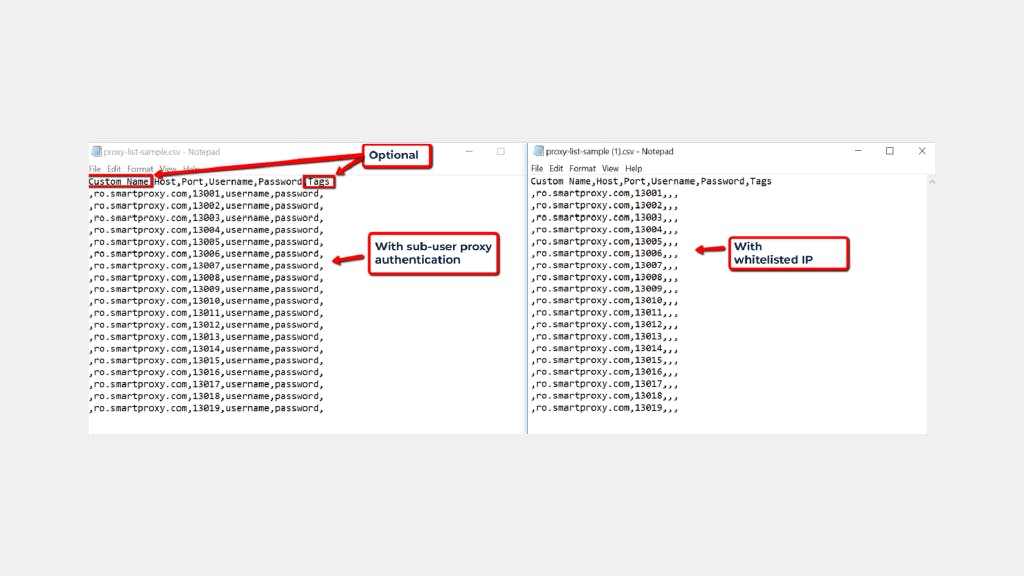
3. Fill in proxy list as per example below:
a) With proxy sub-user authentication username,password;
b) With whitelisted IP (How to whitelist IP).
4. Custom name and Tag fields are optional. Otherwise, separate everything with commas as per example in order for Insomniac Browser to be able to read the list.

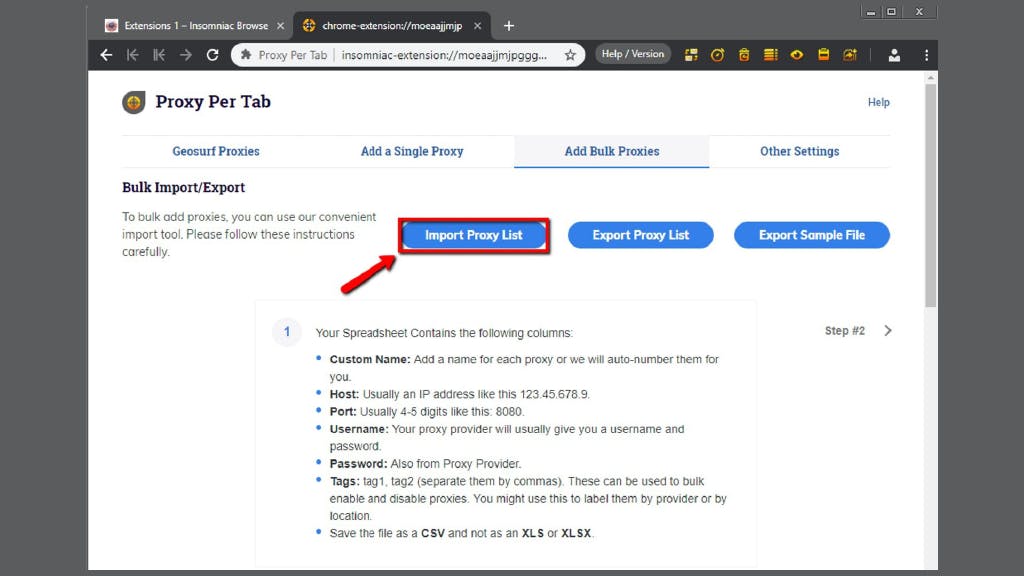
5. Once your CSV file is ready, import it into Insomniac Browser.

6. Apply relevant settings to assign proxies for tabs.
7. Then check https://ipinfo.io to see if your IP changed.

Choose Smartproxy:


Never get flagged
Avoid getting detected by using our vast pool of residential exit nodes.


Unlimited connections
Use an unlimited number of connections, threads and countries at once.


City and Country level targeting
Use residential IPs from as many countries or cities as you like. Change locations as often as needed.

