


Never get flagged
Avoid getting detected by using our vast pool of residential exit nodes.
How to Set up Residential Proxies for ZennoPoster
Learn how to set up residential proxies on ZennoPoster.
Need more information? Email us at [email protected]
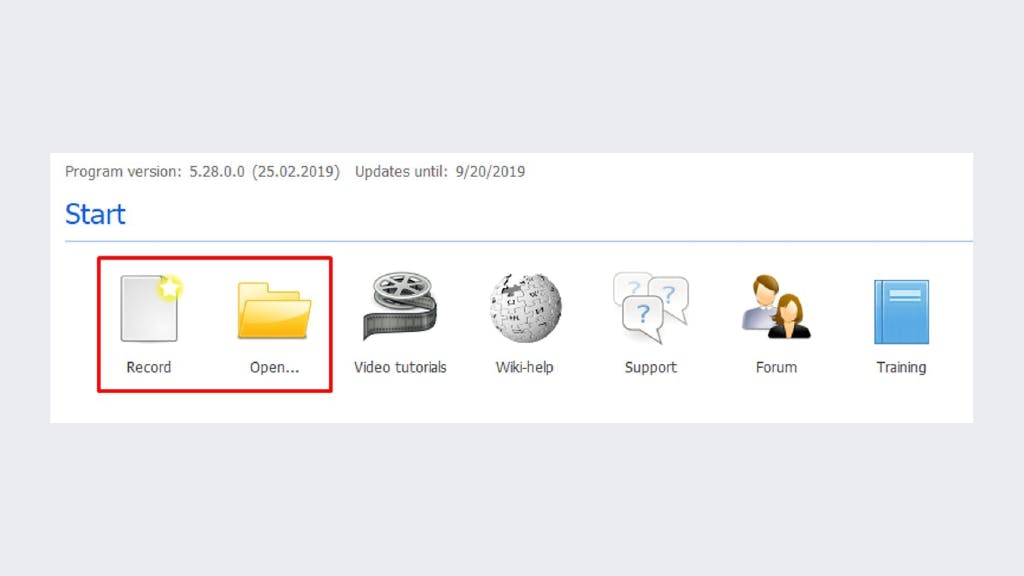
1. Open ProjectMaker for ZennoPoster application to create or edit your project.
2. If you have a project already, click on the Open... button. If you are creating a new project, click on the Record button. If you are editing an existing project, skip to step 6 of this tutorial.
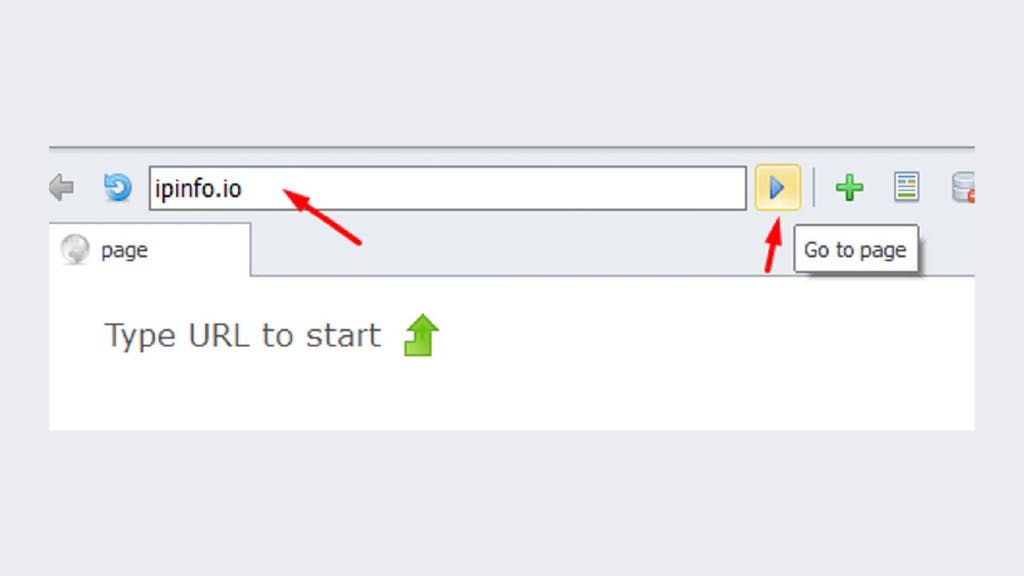
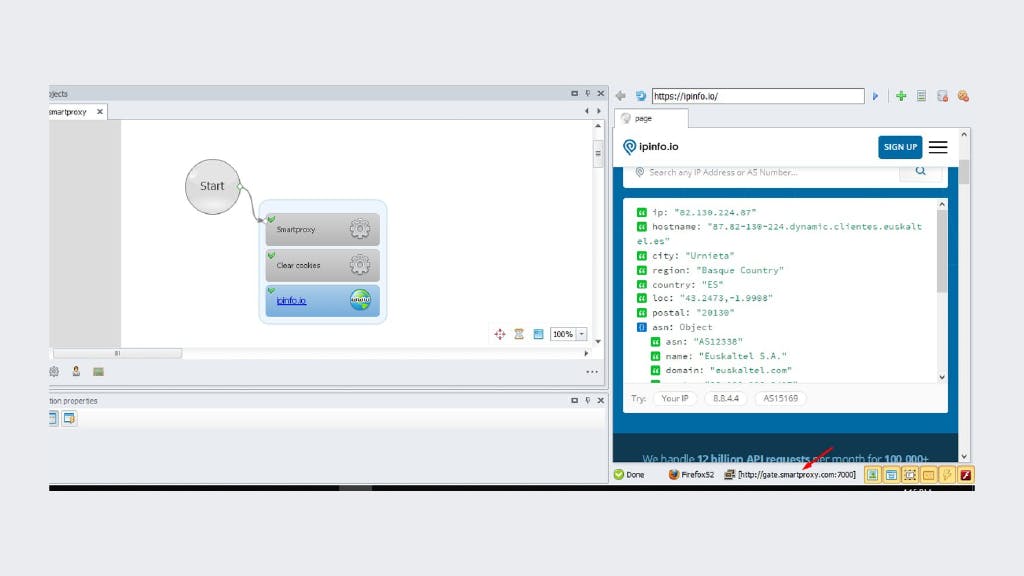
3. To test proxies, you will first need to find a target website. For this tutorial, we will be using a website which checks your IP address. Change the about:startpage line to your target website and click on the Go to page button.
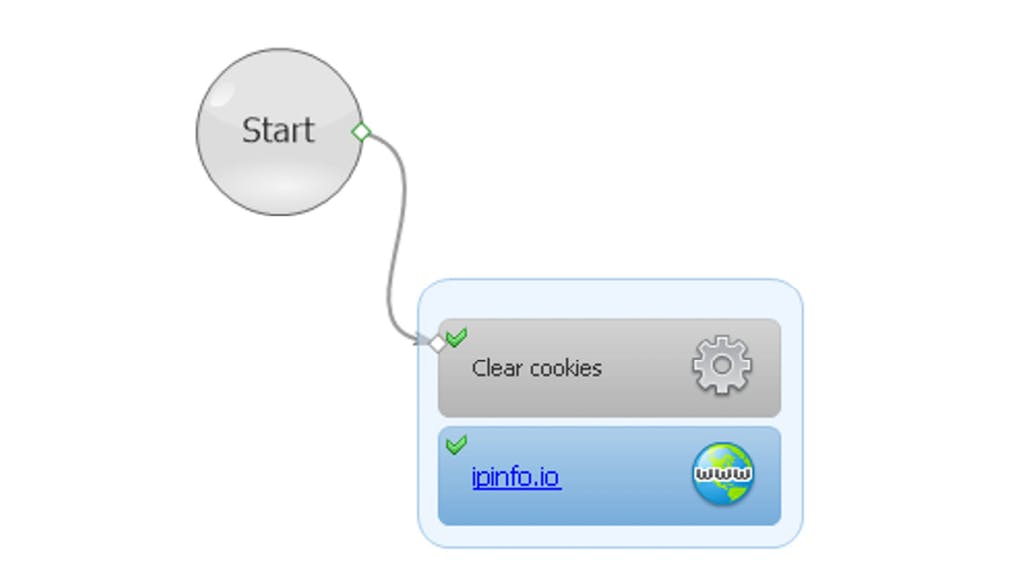
4. As you do that, you should see your pathway in the Project tab.
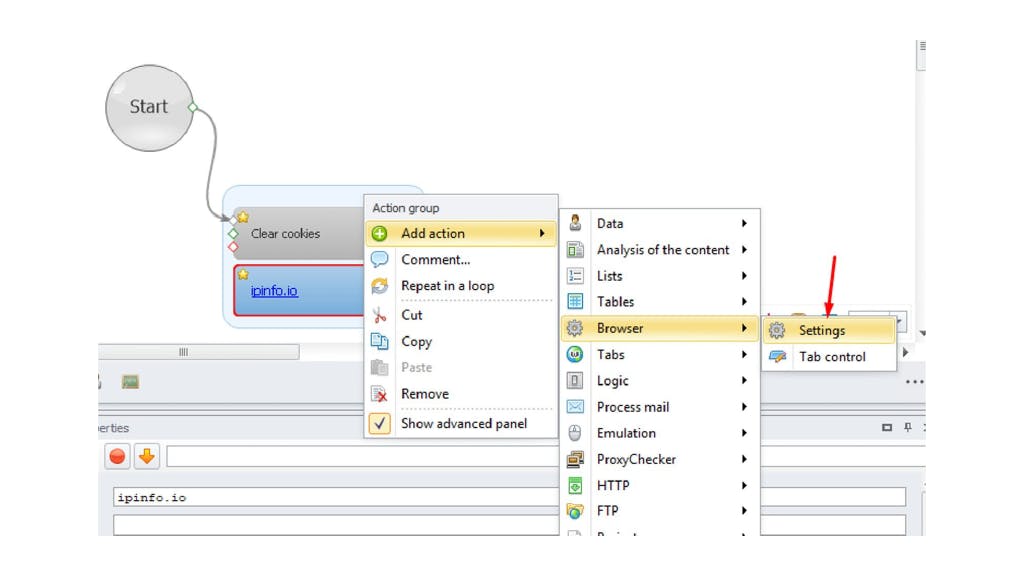
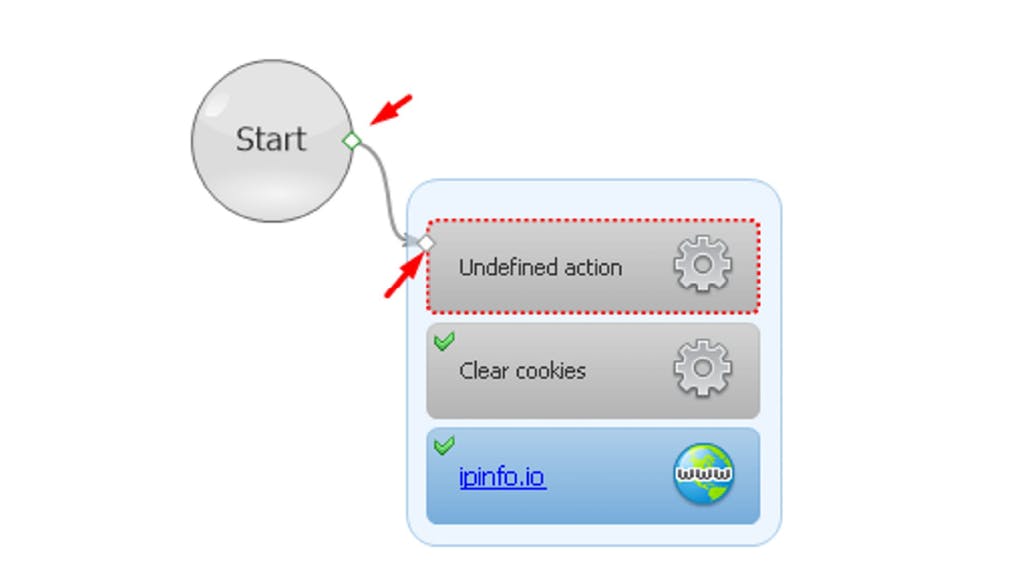
5. Right-click the pathway box, select the option to Add action. Then find Browser and select Settings.
6. You should now see an Undefined action box available. If it's outside of your pathway box, click and drag it back to it. Make sure that the path from Start goes to that Undefined action you have just created.
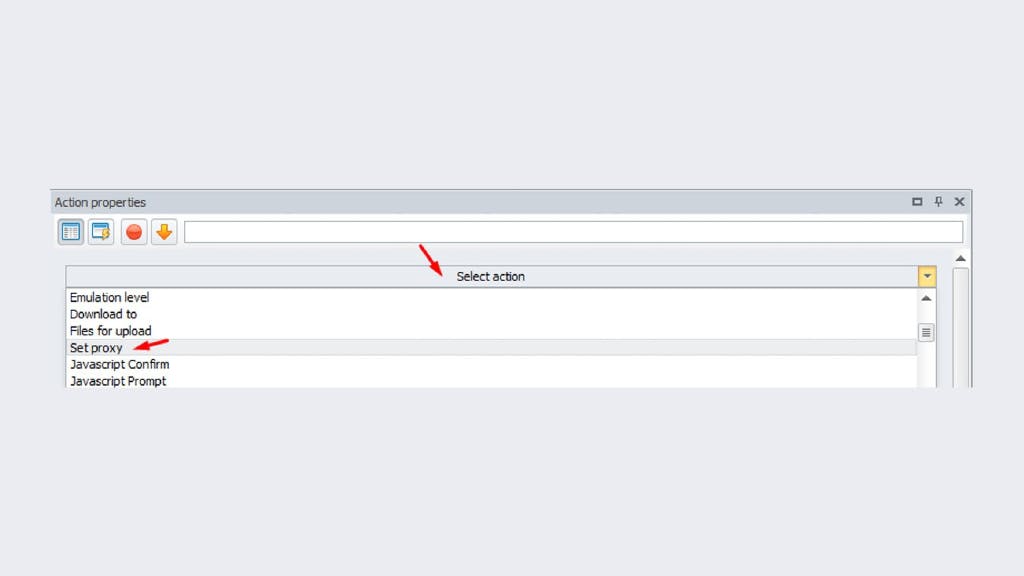
7. Click on the Undefined action box and find the Action properties tab. Hit the Select action button and select Set proxy action.
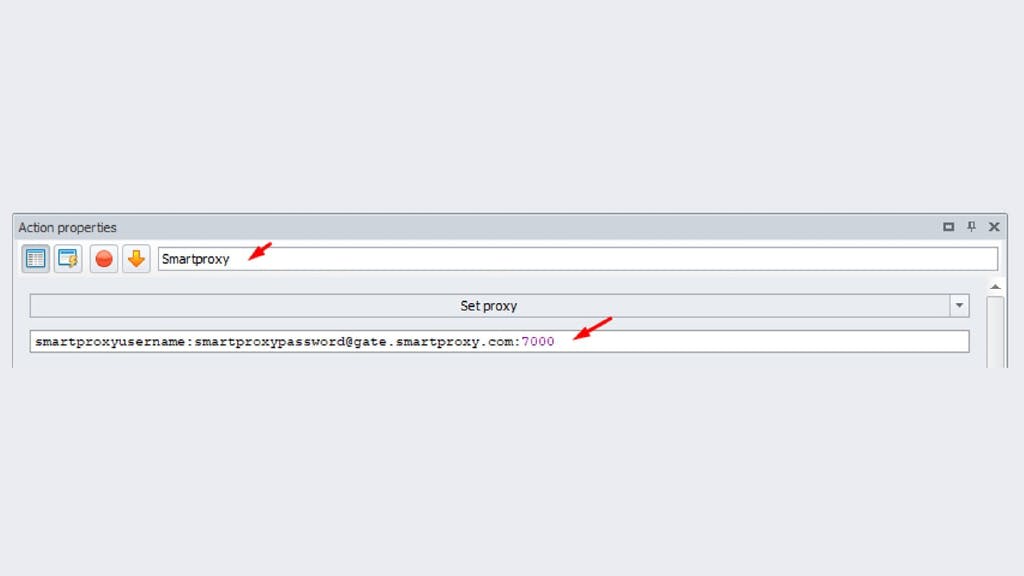
8. ZennoPoster accepts username:password@ip:port format. Use it accordingly to the endpoint and sub-user you wish to use. To enter proxy details, edit the field below Set proxy action. You can rename the box itself as you wish by editing the field below Action properties. If you have your IP whitelisted, you can simply use hostname:port format.
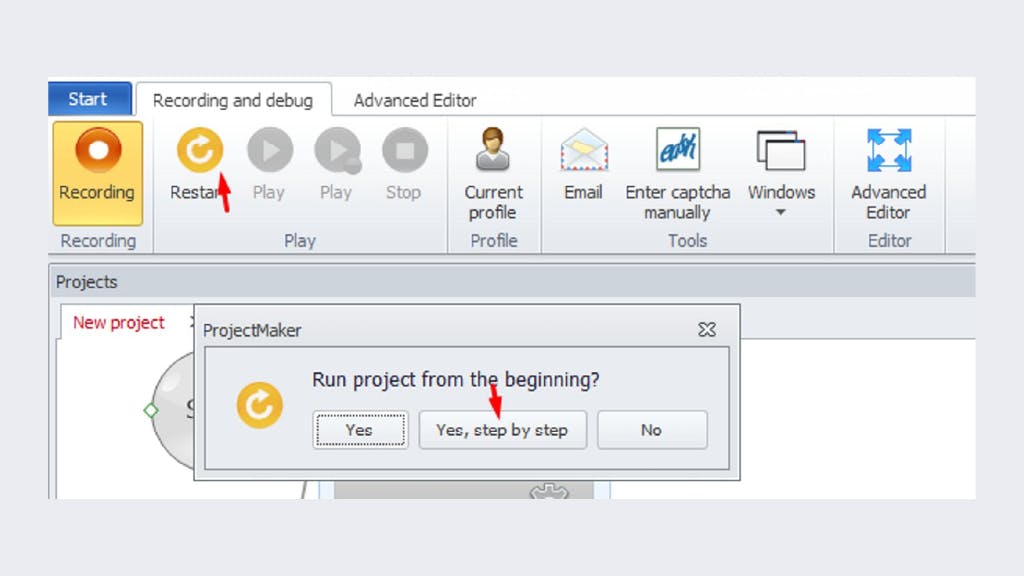
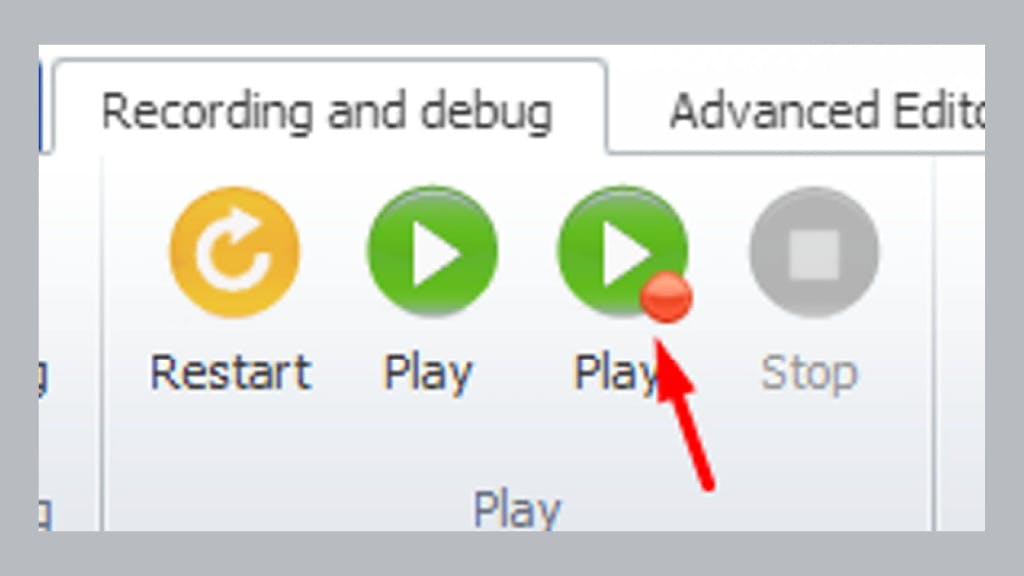
9. Your project should now be ready. Hit the Restart button under Recording and debug the option Yes, step by step in the prompt and save it.
10. To test it, hit the Play button and wait for the page to load.
11. You can save your project and import it to ZennoPoster itself for further tests with your target website.
Loading video...
Avoid getting detected by using our vast pool of residential exit nodes.
Use any shoe bot with an unlimited number of connections, threads, and countries at once.
Use residential IPs from as many countries or cities as you like. Change locations as often as needed.
Experienced 24/7 online technical support via LiveChat with an average response time of 5 minutes. Email us or chat with us at any time.


